
Supertest: Pan-Asian Tier VI Cruiser Rahmat
5 min read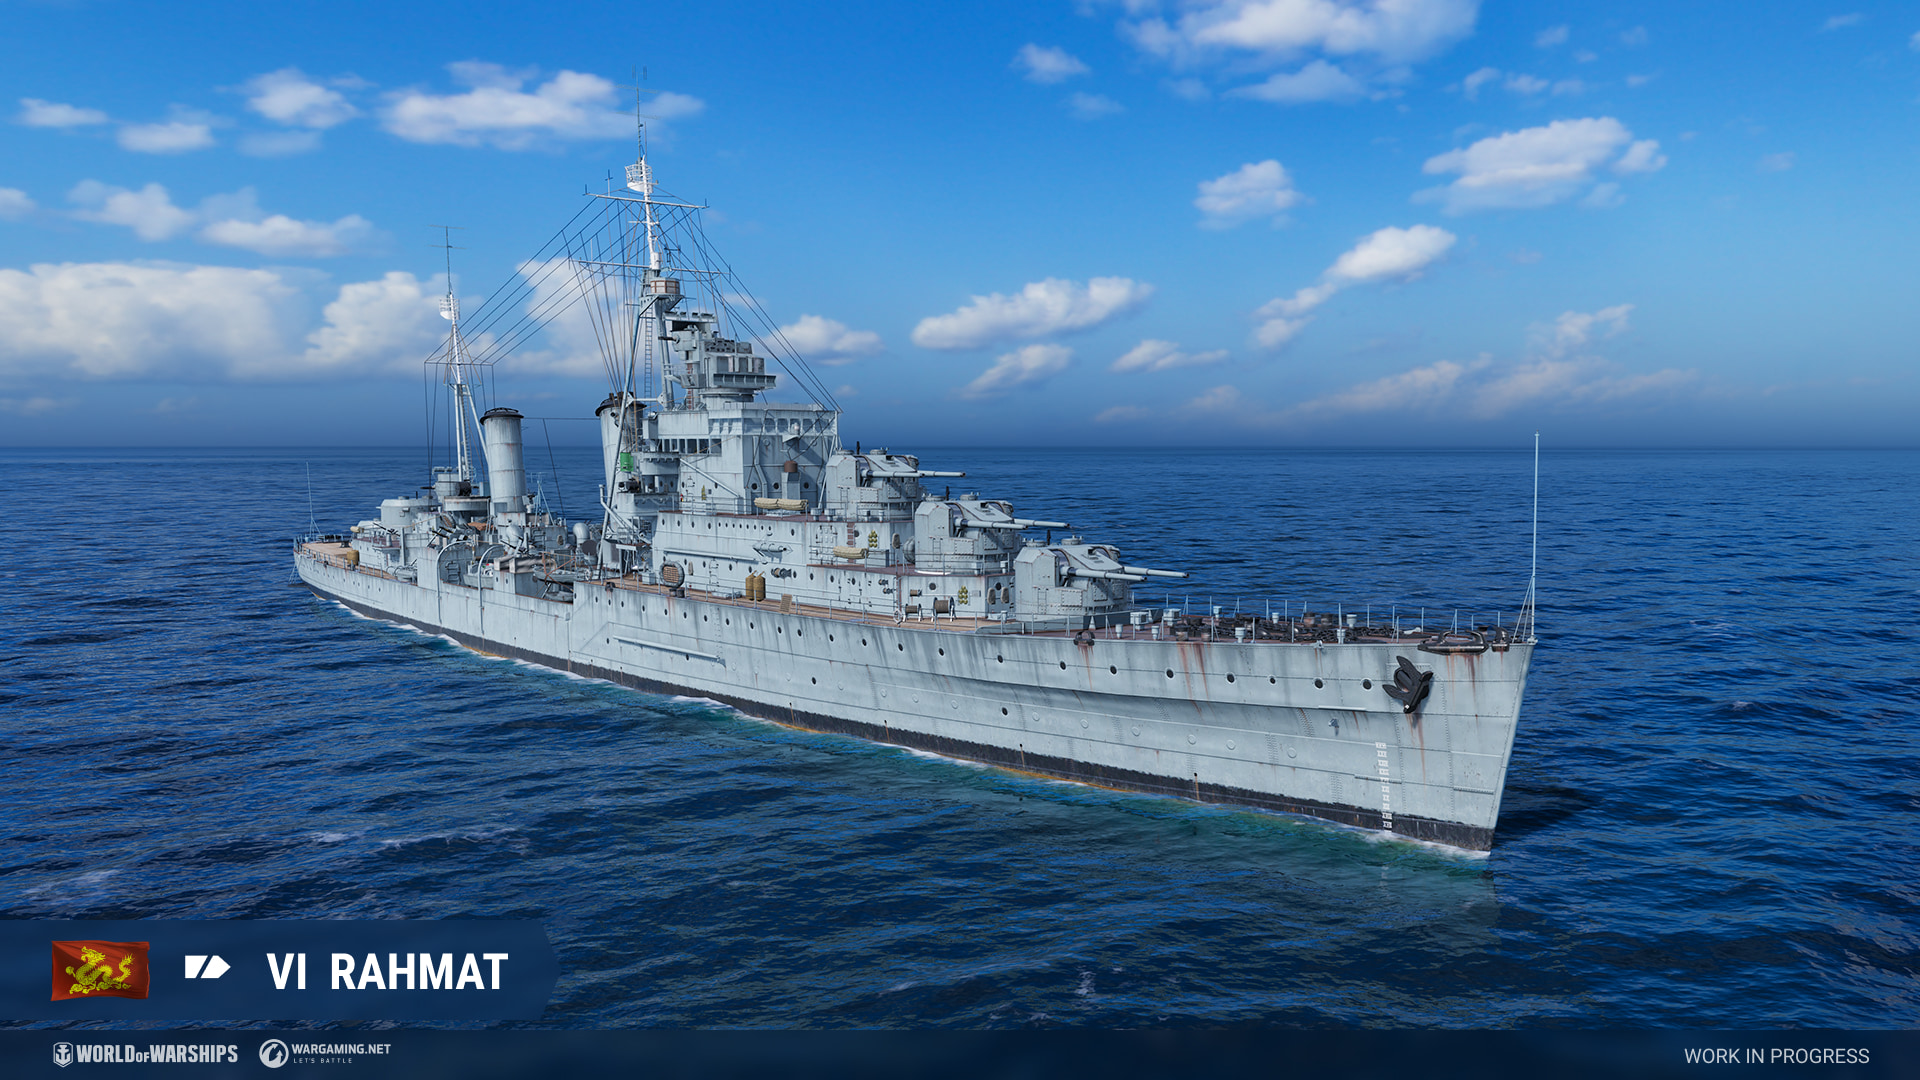
Historical background
The Rahmat is a hypothetical Dido-class light cruiser that would have been transferred to… I guess the Royal Malaysian Navy? It’s honestly the only one I can think of but it’s mostly because they also had a frigate named Rahmat in the 60s/70s.
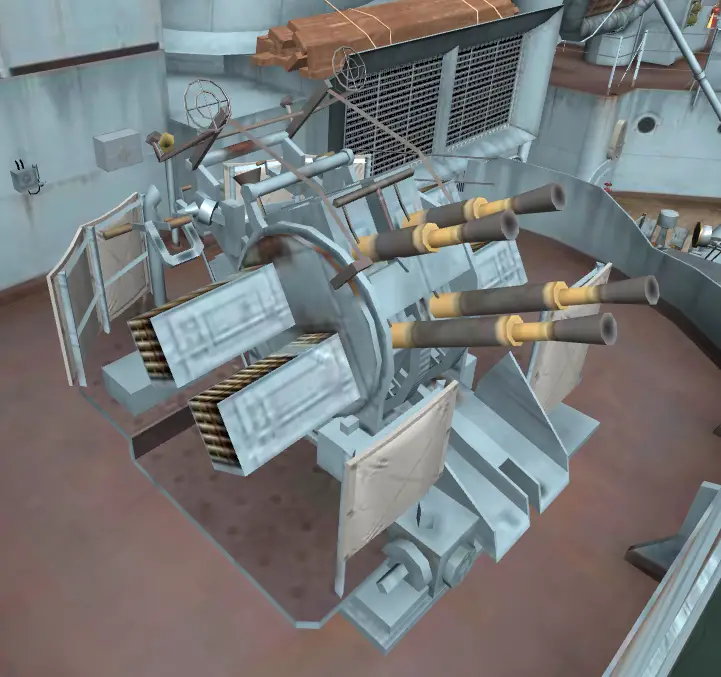
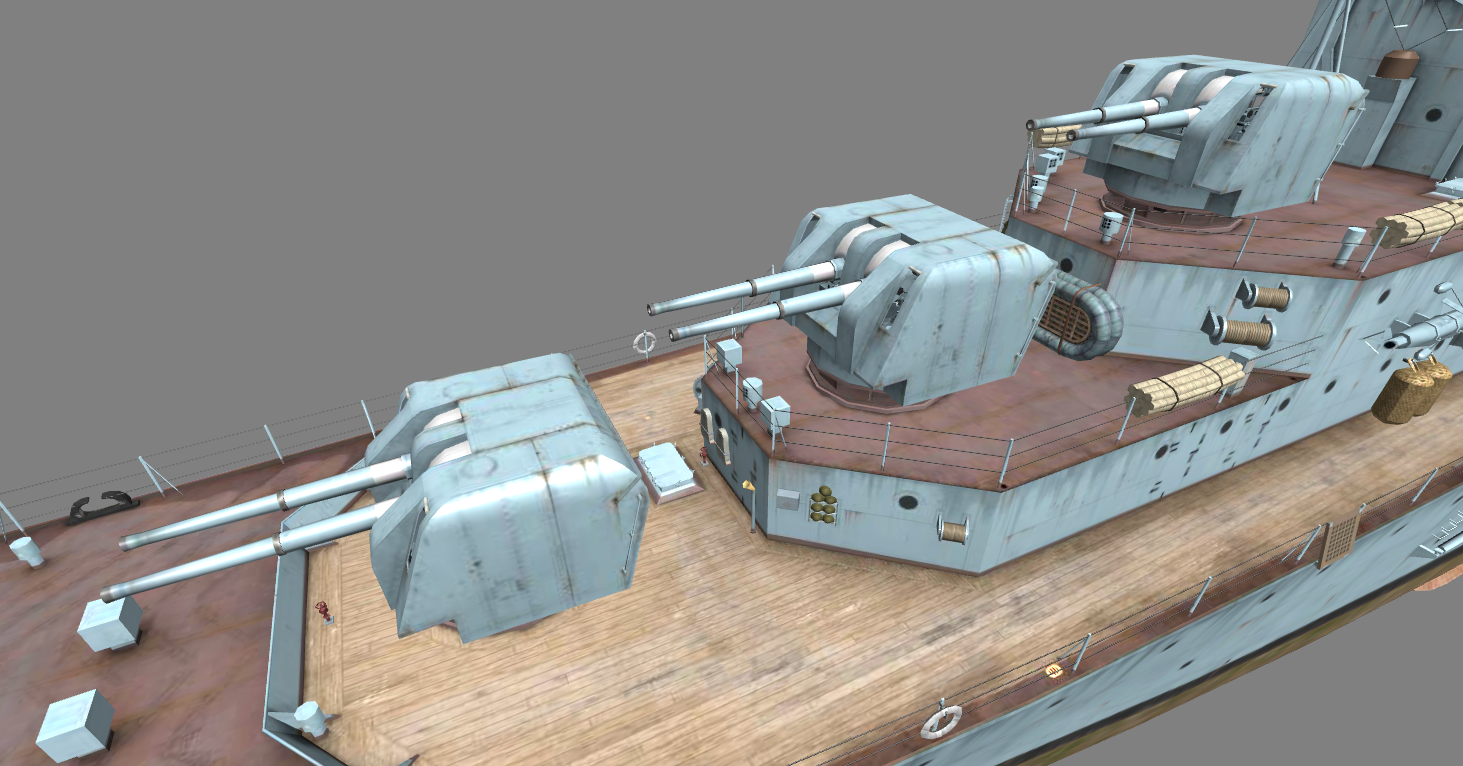
Also, while the A hull is carrying the initially planned five twin turrets with 133 mm (5.25 in) guns, the B hull is… a weird mix between the initial configuration and the configuration some ships received because of a shortage of twin 133 mm turrets in World War II. Because of that shortage, some of the Dido-class members were launched with either missing turrets or different ones. HMS Scylla, for example, was armed with four twin QF 113 mm (4.5 in) Mk.III in UD MK III mountings.
When it comes to the B hull of Rahmat, she is armed with five of these twin 113 mm turrets with three superfiring at the front and two superfiring at the rear.
Just like the rest of the Pan-Asian cruisers, Rahmat gets a Smoke Generator and deepwater torpedoes.
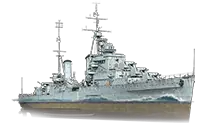
Ship’s preview
Camouflage
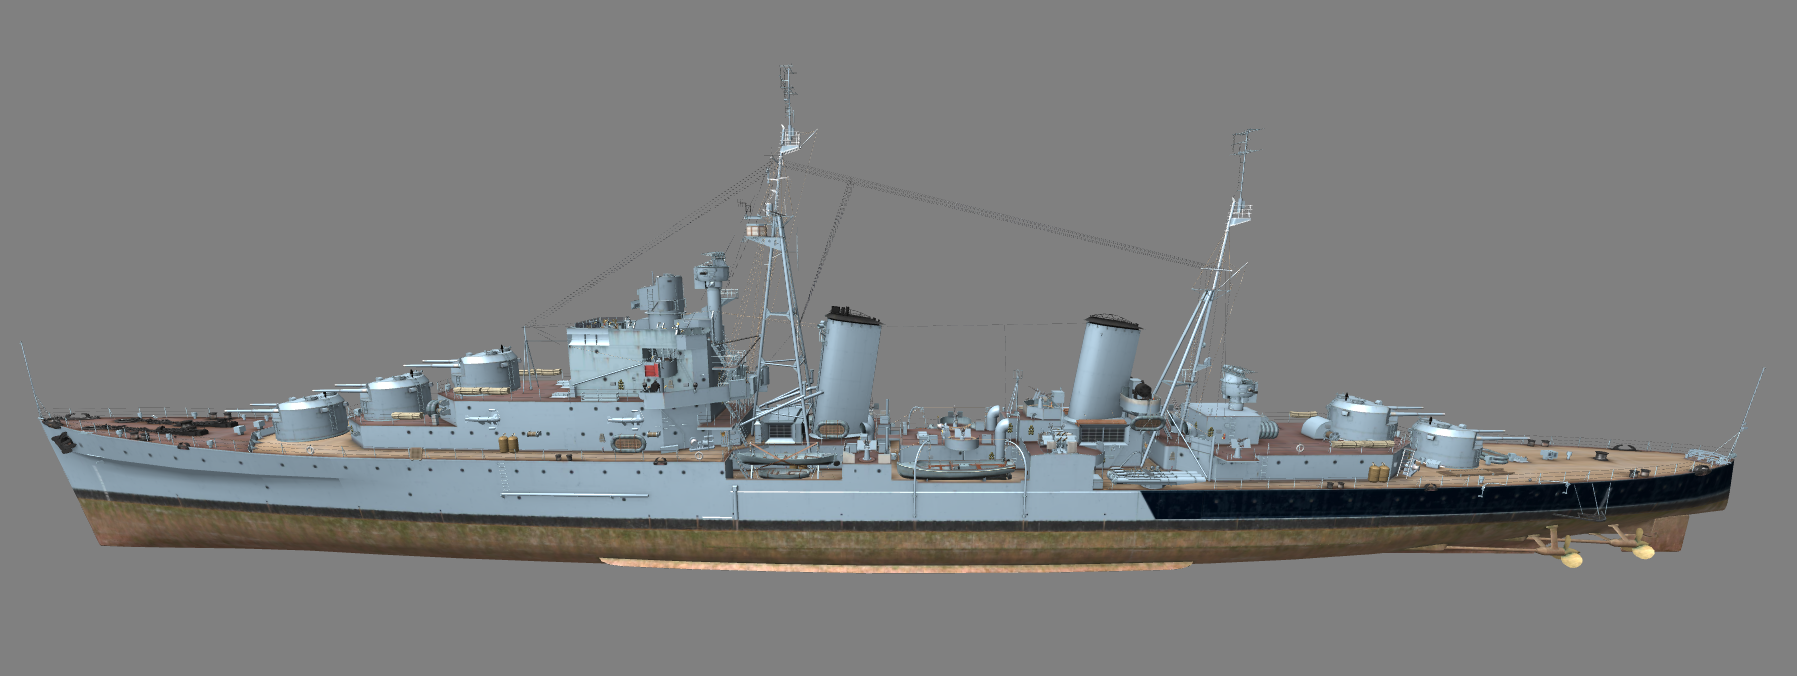
For the classic reminder, this is a ship in testing, anything can change so don’t look at her like she would already be released.
![]()
Modules
Hull | Engine | Gun Fire Control System | Main battery | Torpedoes |
Rahmat (A) |
Propulsion: 62 000 HP |
Mk VI mod. 1 | 133 mm/50 QF Mk I |
533 mm Mk IX** |
Rahmat (B) |
Mk VI mod. 2 |
Stock Ship
General Characteristics
| Tier | VI |
| Health | 21 200 HP |
| Torpedo Damage Reduction | 4 % |
| Displacement | 5 450 tons |
| Dimensions | |
| Overall length | 156.01 m |
| Beam | 15.51 m |
| Overall height (keel to the highest point on the ship) | 17.87 m |
| Freeboard | 3.5 m |
| Main Armament | |
| Maximum Firing Range | 11.360 km |
| 133 mm/50 QF Mk I | 5 x 2 133 mm |
| Torpedo Armament | |
| Maximum Firing Range | 9.500 km |
| 533 mm TR Mk IV | 2 x 3 533 mm |
| Maximum speed | 32.3 knots |
| Turning Circle Radius | 570 m |
| Rudder Shift Time | 9.1 s |
| Surface Detectability | 10.26 km |
| Air Detectability | 6.44 km |
| Detectability After Firing Main Guns in Smoke | 4.26 km |
Main Armament
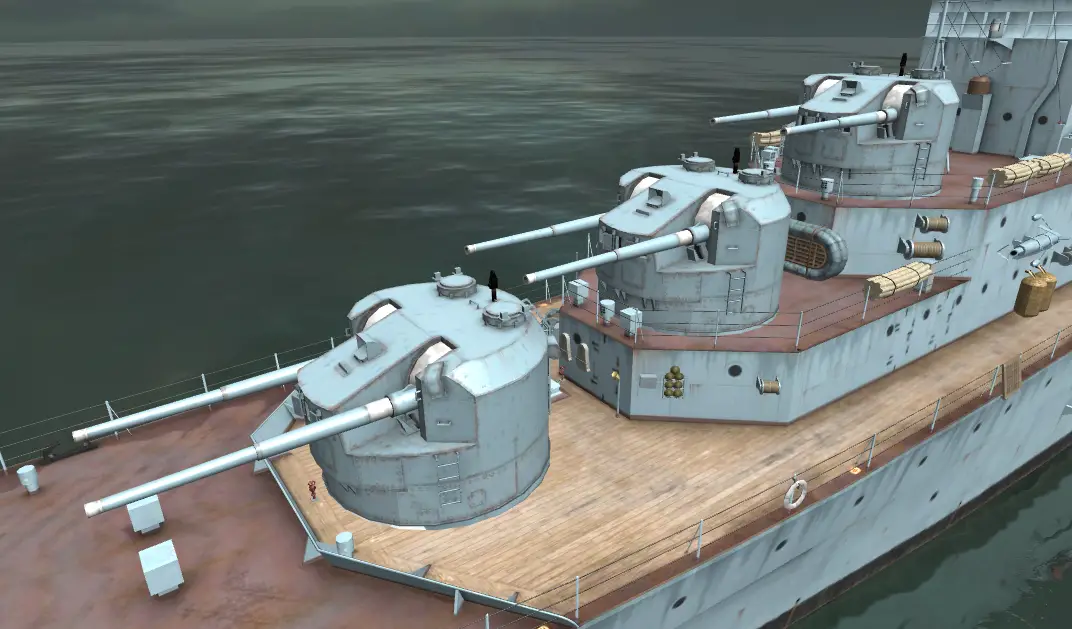
| 5 x 2 133 mm/50 QF Mk I | |
| Maximum Firing Range | 11.360 km |
| Reloading Time | 7.0 s |
| 180 Degree Turn Time | 18.0 s |
| Optimal firing angles at the front | 23° for 4 turrets 43° for 5 turrets |
| Optimal firing angles at the rear | 37° |
| Sigma | 2.05 sigma |
| Maximum Dispersion | 111 m |
| Shells | |
| Type of Projectile | HE – 133 mm HE Mk IC |
| Alpha Damage | 1 900 |
| Penetration capacity | 22 mm |
| Explosion size | 0.46 |
| Fire chance | 8 % |
| Projectile Speed | 792 m/s |
| Air Drag | 0.321 |
| Projectile Mass | 36.3 kg |
| Type of Projectile | AP – 133 mm AP Mk IC |
| Alpha Damage | 2 550 |
| Projectile Speed | 792 m/s |
| Air Drag | 0.321 |
| Projectile Mass | 36.3 kg |
| Projectile Krupp | 2 882 |
| Projectile Detonator | 0.025 s |
| Detonator threshold | 25 mm |
| Ricochet Angles | 45° – 60° |
Torpedo Armament
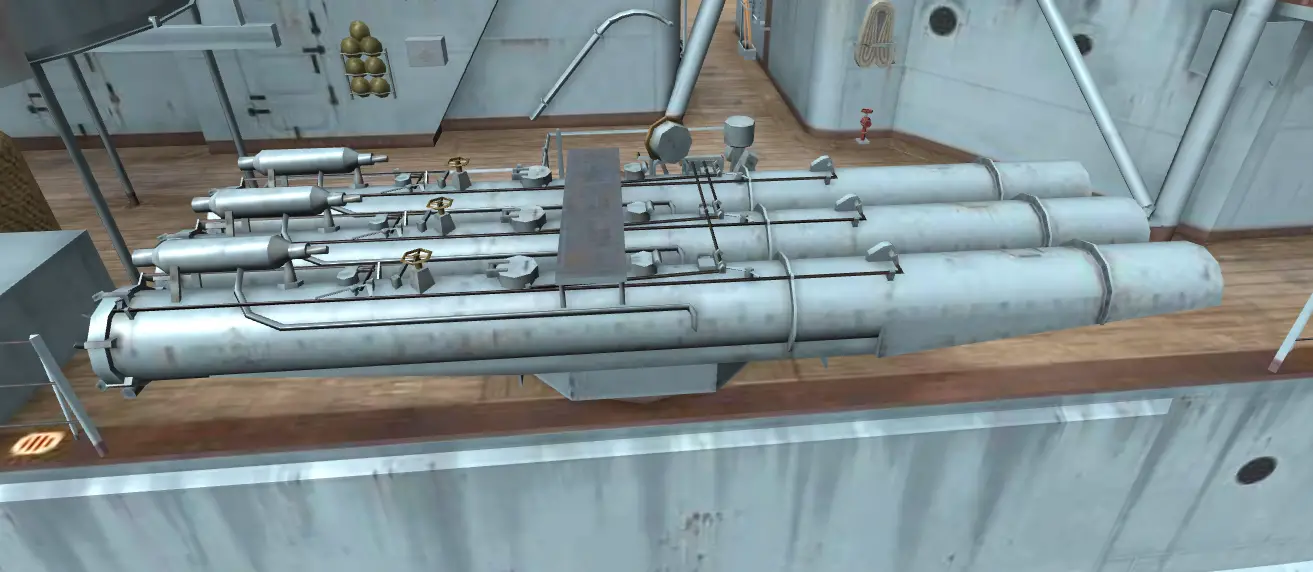
| 2 x 3 533 mm TR Mk IV 533 mm Mk IX* Deepwater: Can only hit cruisers, battleships and aircraft carriers | |
| Reloading Time | 72 s |
| Maximum Distance | 9.500 km |
| Optimal firing angles at the front | 32° |
| Optimal firing angles at the rear | 24° |
| Damage | 15 800 |
| Flooding Chance | 265% |
| Speed | 61 knots |
| Surface Detectability | 0.8 km |
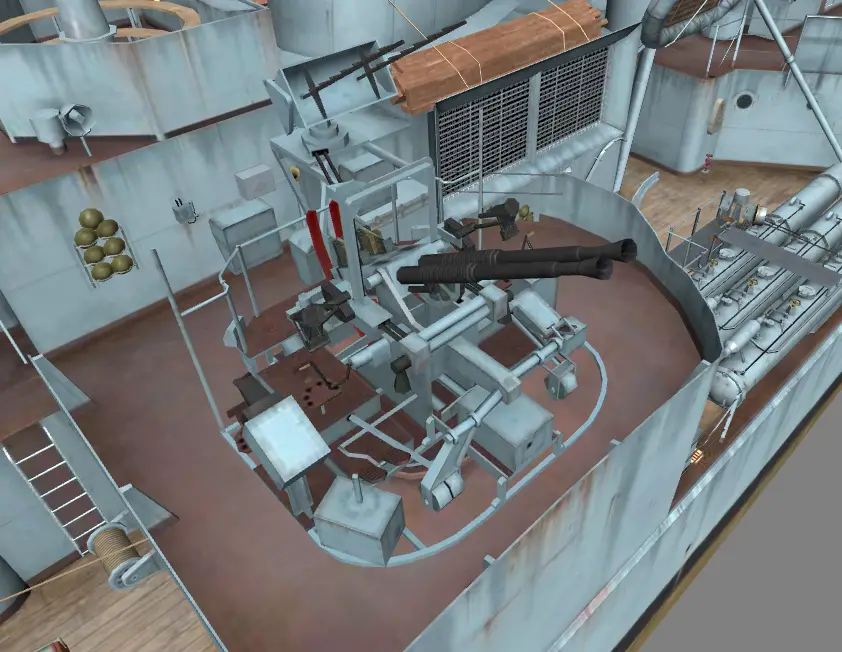
Anti-air Armament
| 5 x 2 133 mm/50 QF Mk I | |
| Sector range | 0.1 km – 5.2 km |
| Hit chance | 90 % |
| Sector’s damage | 18 |
| Sector’s damage frequency | 0.29 s |
| Sector’s damage per second | 63 |
| Flak clouds number | 2 |
| Flak cloud damage | 1 260 |
| 2 x 4 40 mm/39 QF Mk VII | |
| Sector range | 0.1 km – 2.5 km |
| Hit chance | 90 % |
| Sector’s damage | 17 |
| Sector’s damage frequency | 0.29 s |
| Sector’s damage per second | 60 |
| 4 x 2 20 mm Oerlikon Mk20 3 x 1 20 mm Oerlikon Mk4 | |
| Sector range | 0.1 km – 2.0 km |
| Hit chance | 85 % |
| Sector’s damage | 27 |
| Sector’s damage frequency | 0.29 s |
| Sector’s damage per second | 95 |
Consumable
Slot 1 | Slot 2 | Slot 3 |
Damage Control Party  Work time: 5 s Cooldown: 60 s | Defensive AA Fire
Number of charges: 3 Work time: 40 s Cooldown: 80 s Damage from continuous DPS: +50% Damage from flak explosions: +300% | Smoke Generator
Number of charges: 3 Work time: 30 s Cooldown: 100 s Smoke radius: 450 m Smoke duration: 70 s |


Fully Upgraded Ship
General Characteristics
| Tier | VI |
| Health | 23 600 HP |
| Torpedo Damage Reduction | 4 % |
| Displacement | 6 900 tons |
| Dimensions | |
| Overall length | 156.01 m |
| Beam | 15.51 m |
| Overall height (keel to the highest point on the ship) | 17.87 m |
| Freeboard | 3.5 m |
| Main Armament | |
| Maximum Firing Range | 12.496 km |
| 113 mm/45 Mk III UD | 5 x 2 113 mm |
| Torpedo Armament | |
| Maximum Firing Range | 9.500 km |
| 533 mm TR Mk IV | 2 x 3 533 mm |
| Maximum speed | 32.3 knots |
| Turning Circle Radius | 570 m |
| Rudder Shift Time | 6.5 s |
| Surface Detectability | 10.26 km |
| Air Detectability | 6.44 km |
| Detectability After Firing Main Guns in Smoke | 4.26 km |
Main Armament
| 5 x 2 113 mm/45 Mk III UD | |
| Maximum Firing Range | 12.496 km |
| Reloading Time | 5.25 s |
| 180 Degree Turn Time | 9.0 s |
| Optimal firing angles at the front | 20° for 4 turrets 37° for 5 turrets |
| Optimal firing angles at the rear | 33° |
| Sigma | 2.05 sigma |
| Maximum Dispersion | 119 m |
| Shells | |
| Type of Projectile | HE – 113 mm HE Mk XVI |
| Alpha Damage | 1 600 |
| Penetration capacity | 19 mm |
| Explosion size | 0.36 |
| Fire chance | 7 % |
| Projectile Speed | 746 m/s |
| Air Drag | 0.33 |
| Projectile Mass | 25.0 kg |
| Type of Projectile | AP – 113 mm AP Mk XVI |
| Alpha Damage | 2 100 |
| Projectile Speed | 746 m/s |
| Air Drag | 0.33 |
| Projectile Mass | 25.0 kg |
| Projectile Krupp | 2 882 |
| Projectile Detonator | 0.025 s |
| Detonator threshold | 25 mm |
| Ricochet Angles | 45° – 60° |
Torpedo Armament
| 2 x 3 533 mm TR Mk IV 533 mm Mk IX* Deepwater: Can only hit cruisers, battleships and aircraft carriers | |
| Reloading Time | 72 s |
| Maximum Distance | 9.500 km |
| Optimal firing angles at the front | 32° |
| Optimal firing angles at the rear | 24° |
| Damage | 15 800 |
| Flooding Chance | 265% |
| Speed | 61 knots |
| Surface Detectability | 0.8 km |
Anti-air Armament
| 5 x 2 113 mm/45 Mk III UD | |
| Sector range | 0.1 km – 5.8 km |
| Hit chance | 90 % |
| Sector’s damage | 18 |
| Sector’s damage frequency | 0.29 s |
| Sector’s damage per second | 63 |
| Flak clouds number | 2 |
| Flak cloud damage | 1 190 |
| 4 x 1 40 mm Bofors Mk VII 2 x 2 40 mm Bofors Mk IV | |
| Sector range | 0.1 km – 3.5 km |
| Hit chance | 90 % |
| Sector’s damage | 45 |
| Sector’s damage frequency | 0.29 s |
| Sector’s damage per second | 158 |
| 5 x 1 20 mm Oerlikon Mk4 | |
| Sector range | 0.1 km – 2.0 km |
| Hit chance | 85 % |
| Sector’s damage | 12 |
| Sector’s damage frequency | 0.29 s |
| Sector’s damage per second | 42 |
Consumable
Slot 1 | Slot 2 | Slot 3 |
Damage Control Party Work time: 5 s Cooldown: 60 s | Defensive AA Fire
Number of charges: 3 Work time: 40 s Cooldown: 80 s Damage from continuous DPS: +50% Damage from flak explosions: +300% | Smoke Generator
Number of charges: 3 Work time: 30 s Cooldown: 100 s Smoke radius: 450 m Smoke duration: 70 s |
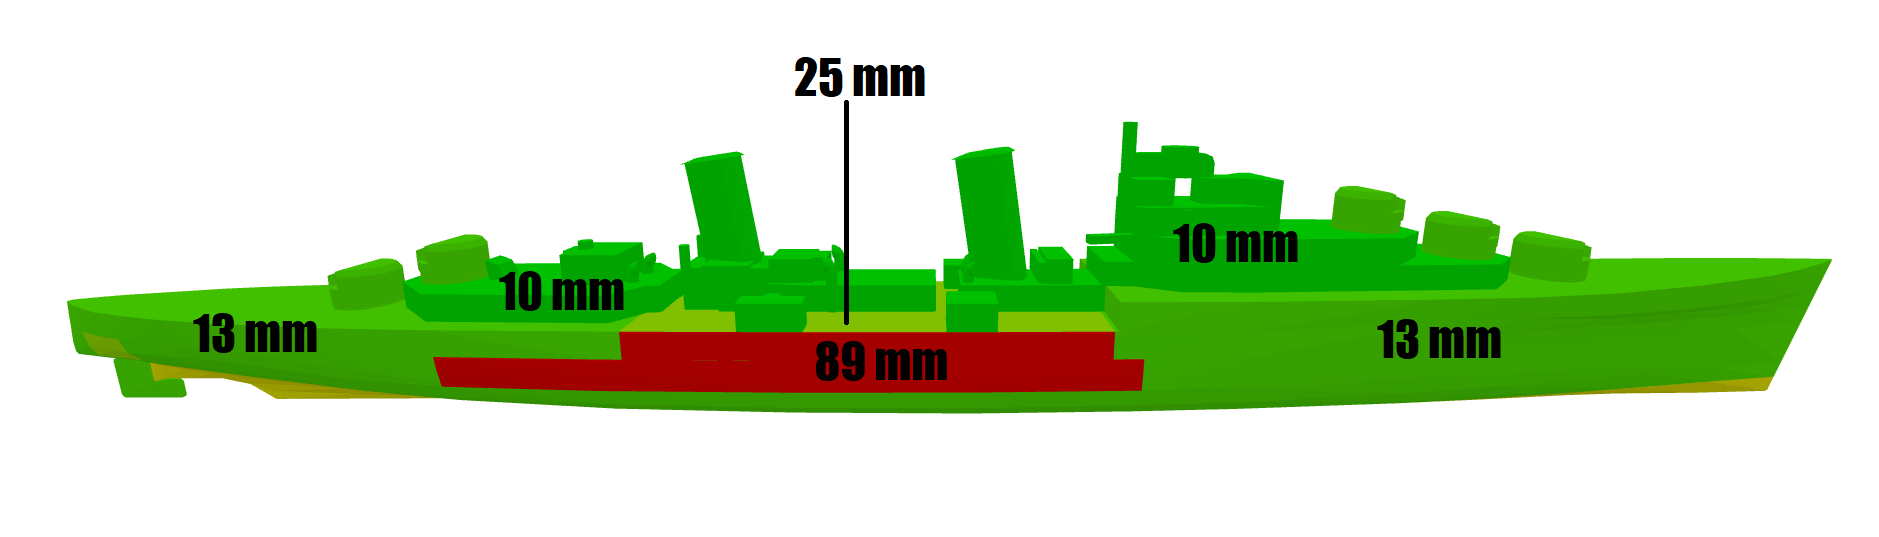
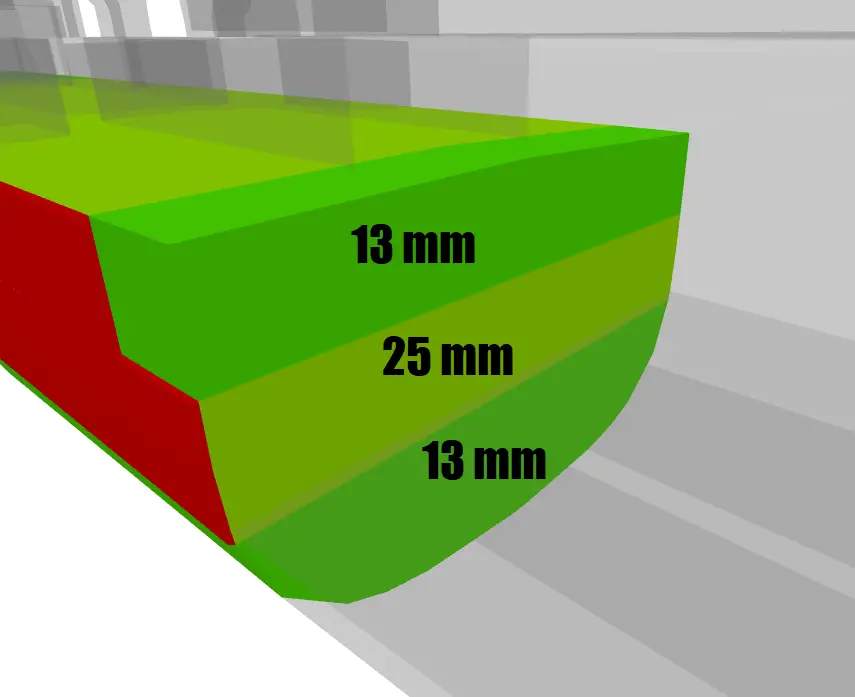
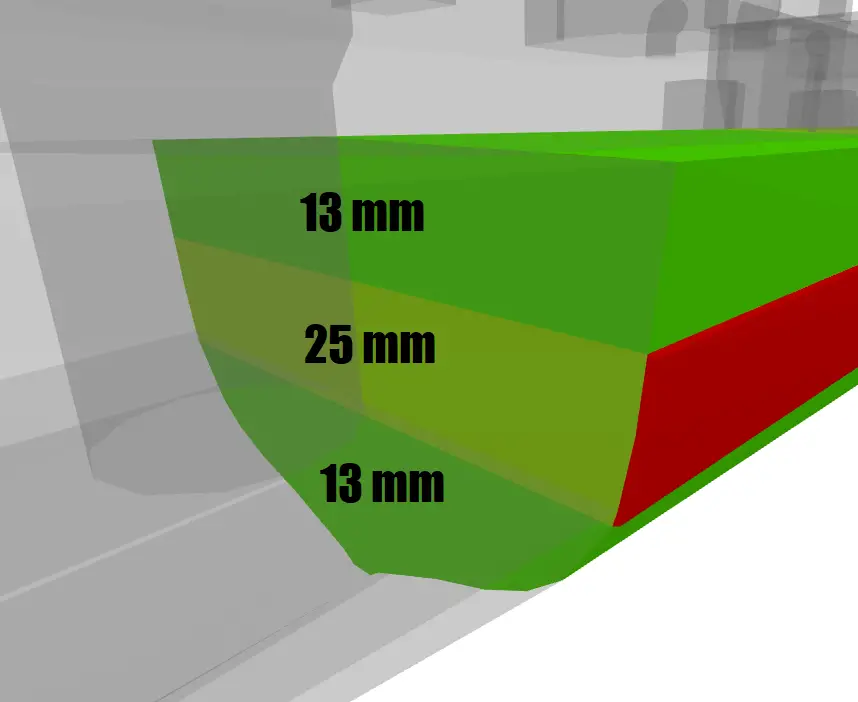
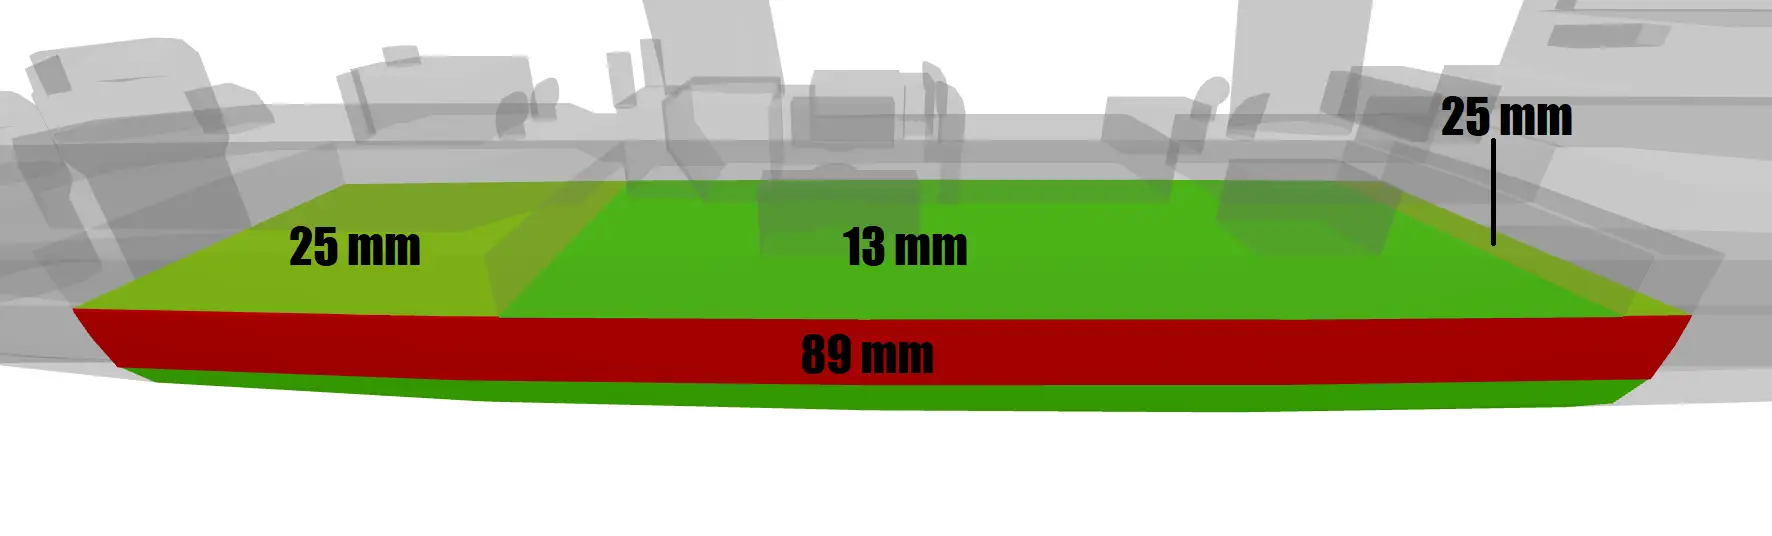
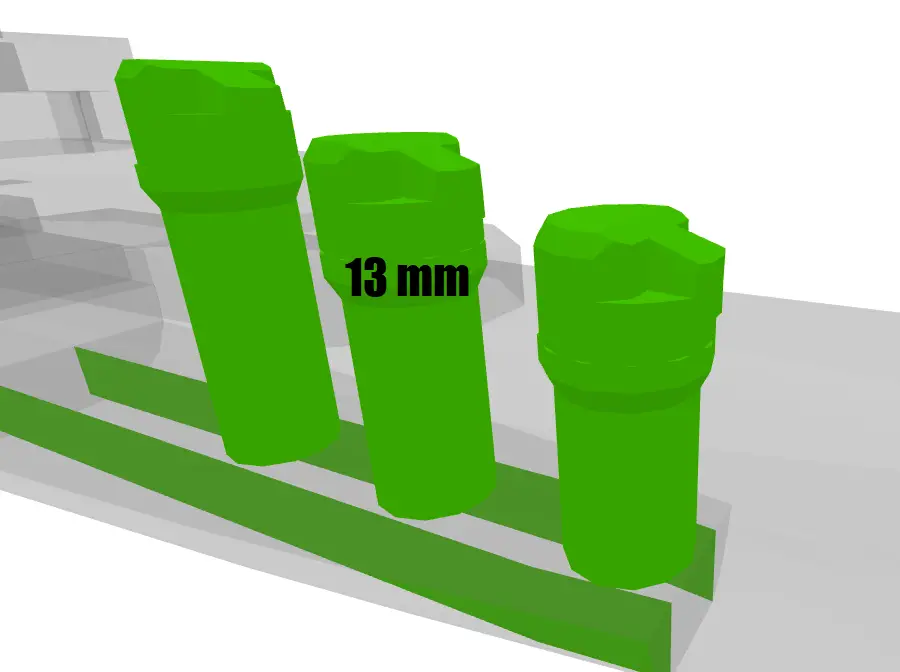
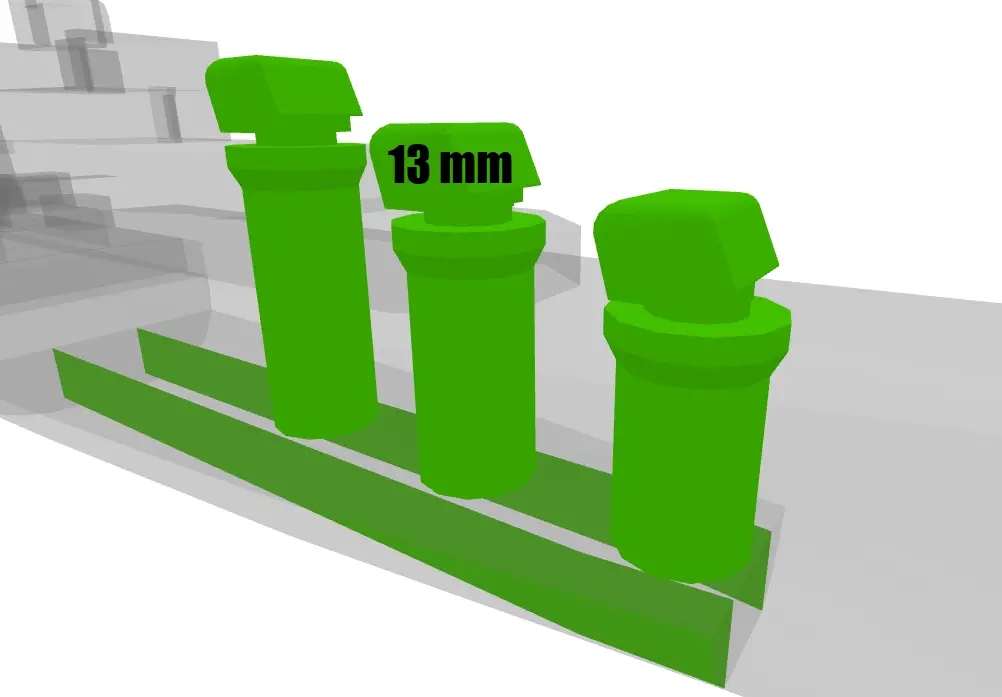
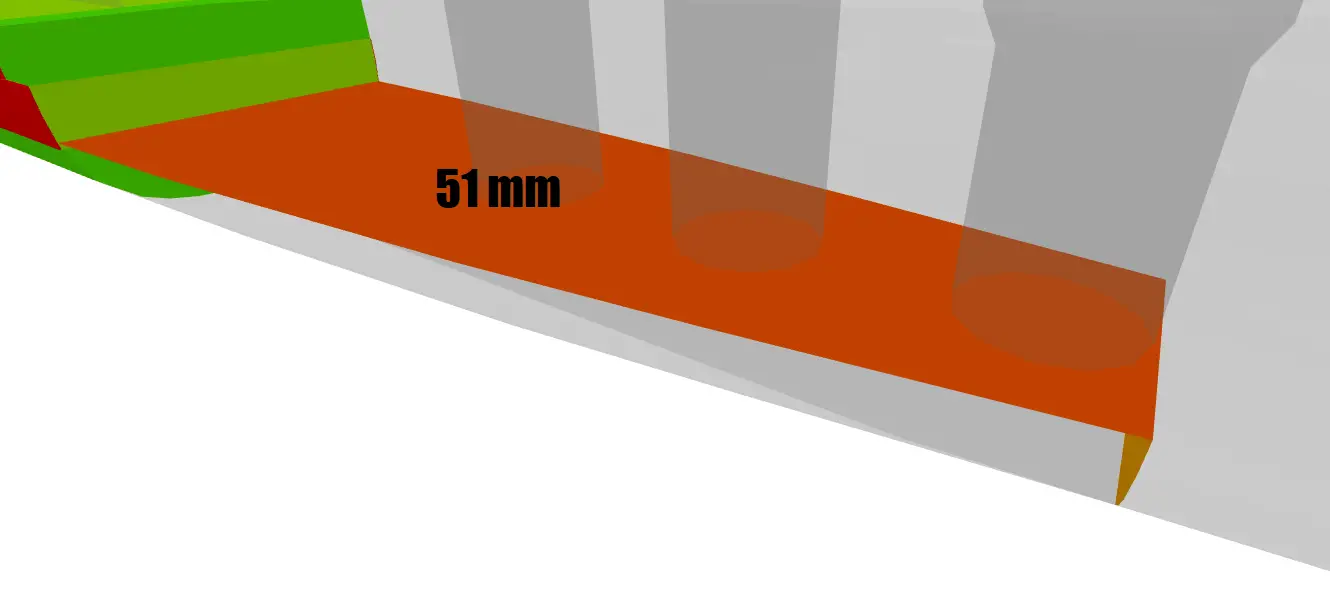
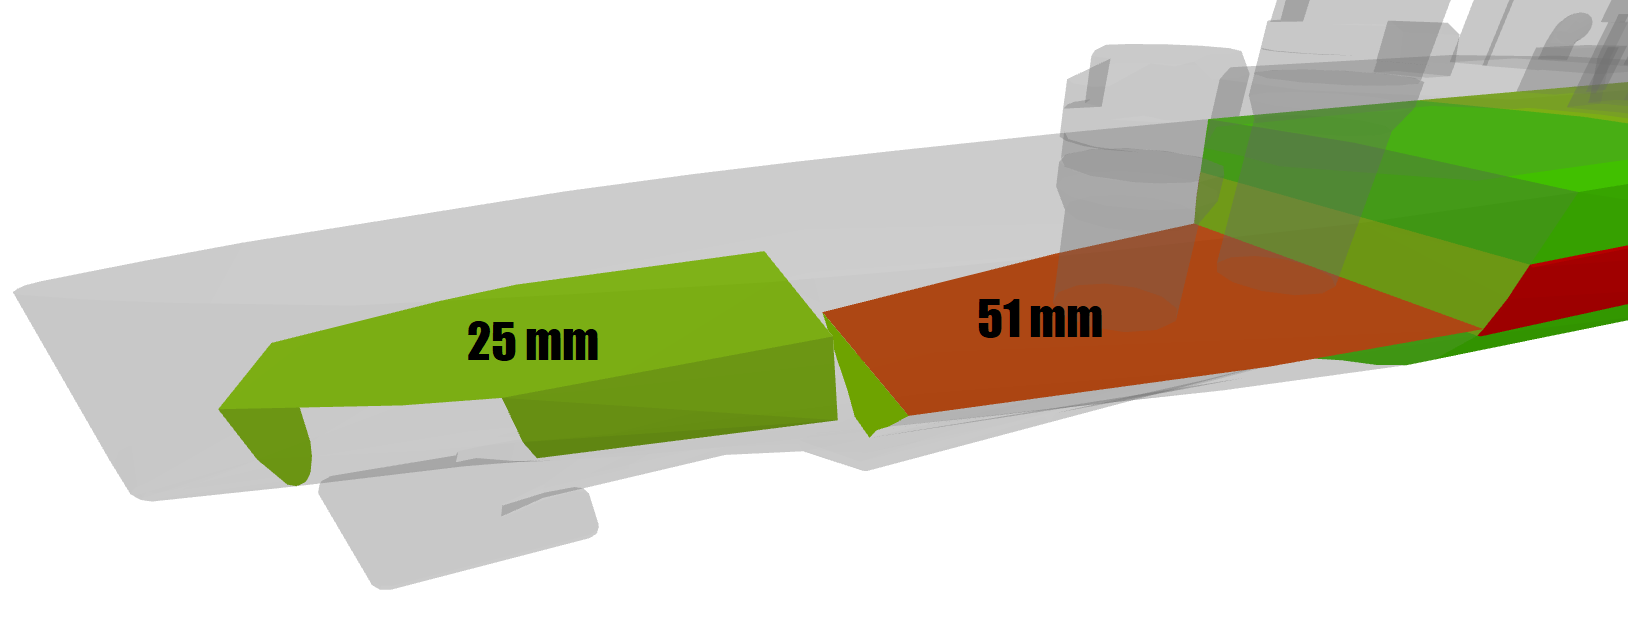
The Armor
External armor protection:
Front and rear armor protection of the middle section:
Citadel armor protection:
Turrets armor protection:
Hidden armor platings in the bow and stern:
Personal Opinion
On paper, Rahmat looks relatively decent. Basically a tier VI Atlanta but with the Smoke Generator to have more freedom of movement which will be much needed considering her short firing range.
As for her torpedoes, the reload time is nice but at the same time, it’s only 3 torpedoes per side so their actual impact will be quite limited.
Thank you for reading this article!
Don’t hesitate to subscribe to our notifications to make sure that you don’t miss any future articles.
Have a good one and see you soon!


Does she have ASW planes or depthcharges (or neither)?
All the T6+ Pan-Asian light cruisers have depth charges. I currently don’t cover anything related to ASW because subs are still in development.
Pan-Asian Cruiser Rahmat, Tier VI:
In order to achieve a more consistent progression of ship’s artillery, the 133mm main battery guns became a separate researchable module that is compatible with either of the equipped hulls.
133mm main battery guns reload time decreased from 7 to 6.5 s.
113mm main battery guns reload time increased from 5.3 to 6 s.
180-degree turn time for the 113mm turrets increased from 9 to 18 s.