
World of Warships Final Review: British Tier VII Premium Battleship Collingwood
7 min read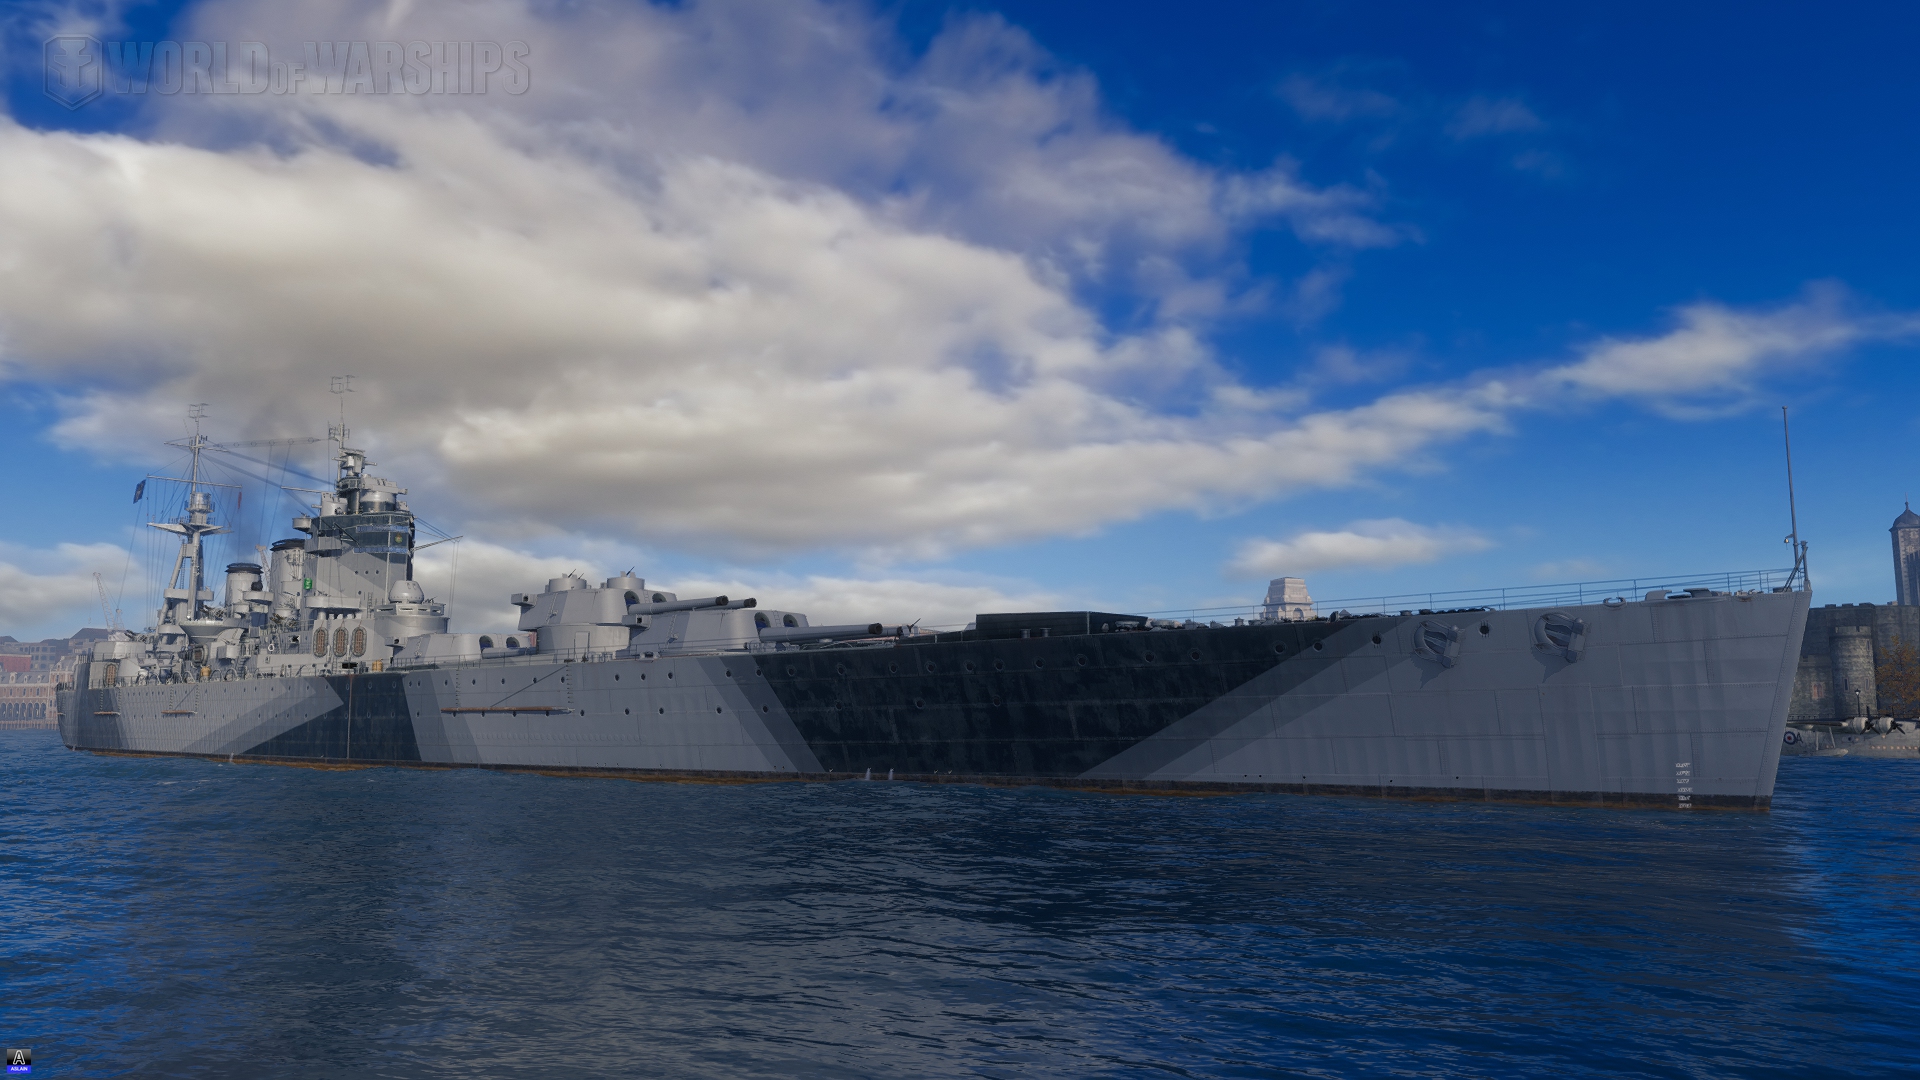
Just like with every new line, a new premium ship gets released in parallel to the British battlecruisers. However, it isn’t a battlecruiser at all and the ship isn’t particularly suited to be a commander trainer. It is especially true when considering the Collingwood’s characteristics that are almost day and night with the new line. Also, just like Toulon, Collingwood is absolutely rubbish…
When it comes to how you will be able to obtain the Collingwood, it will work the same way as Toulon with the last event. Collingwood will be only available in the random bundles, alongside Duncan, costing 1 000 doubloons each. She will, later on, be released in the Premium shop. There are 70 bundles in total and I cannot stress this enough when saying that the last thing you want is to burn 70 000 doubloons (which is more than 230€ by the way) for this pile of junk.
Historical background
Collingwood is roughly based on the F2 battlecruiser design from November 1921. The design, following the limitations of the Washington Naval Treaty, was armed with six 381 mm (15″) guns in three twin turrets and had a planned displacement of 35 000 tons. At the same time, the O3 design of battleship was being developed and lead to the creation of the Nelson-class.
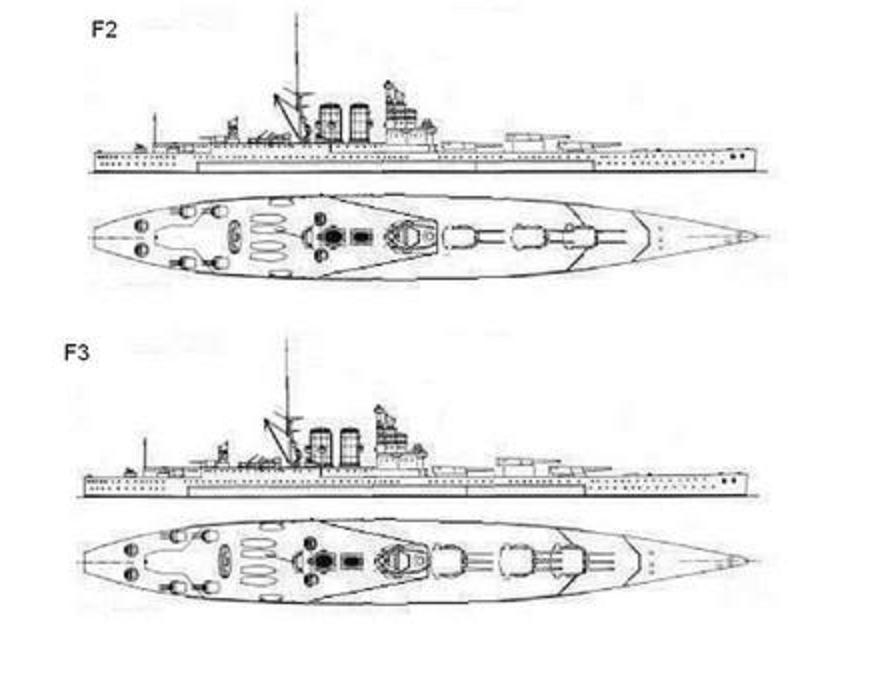
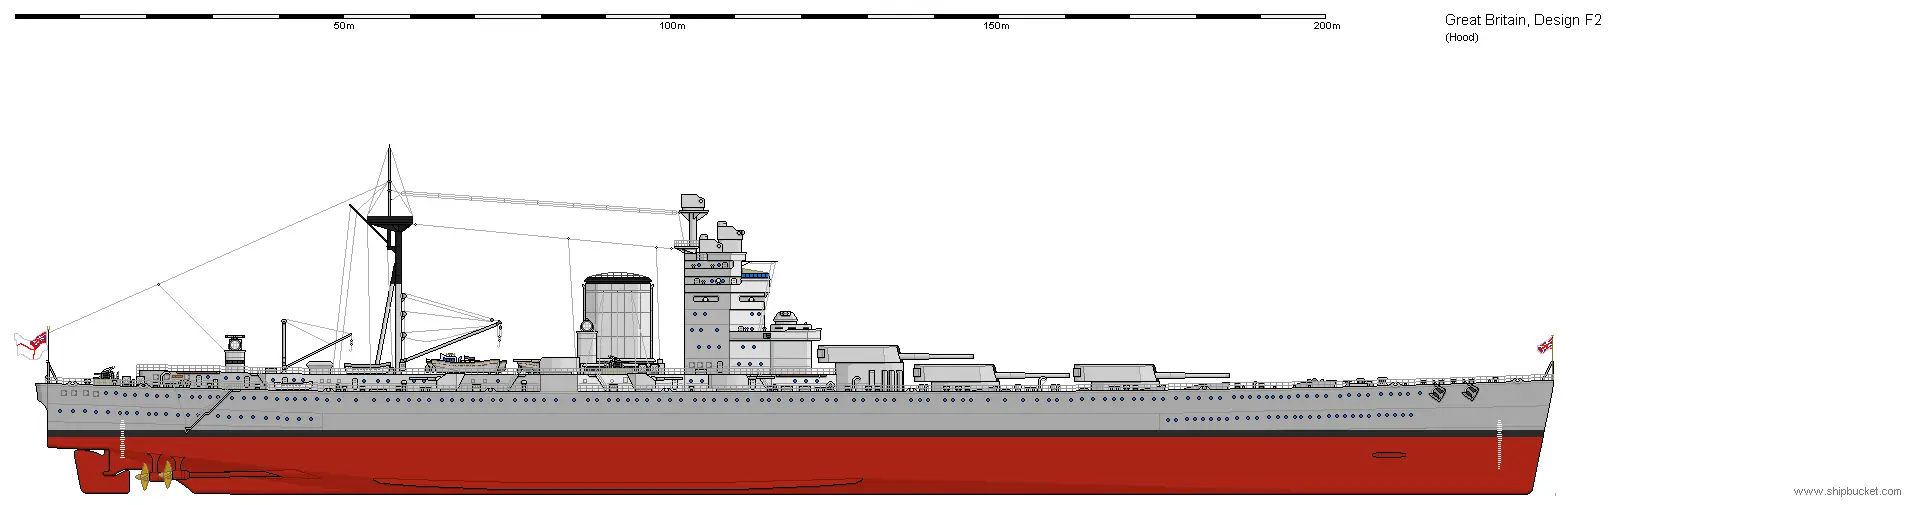
In World of Warships, Collingwood is loosely following the F2 design but with clear modifications. Namely, she is armed with 419 mm (16.5″) guns and her speed was dropped from the 29 knots of the F2 design to 25 knots for some reason.
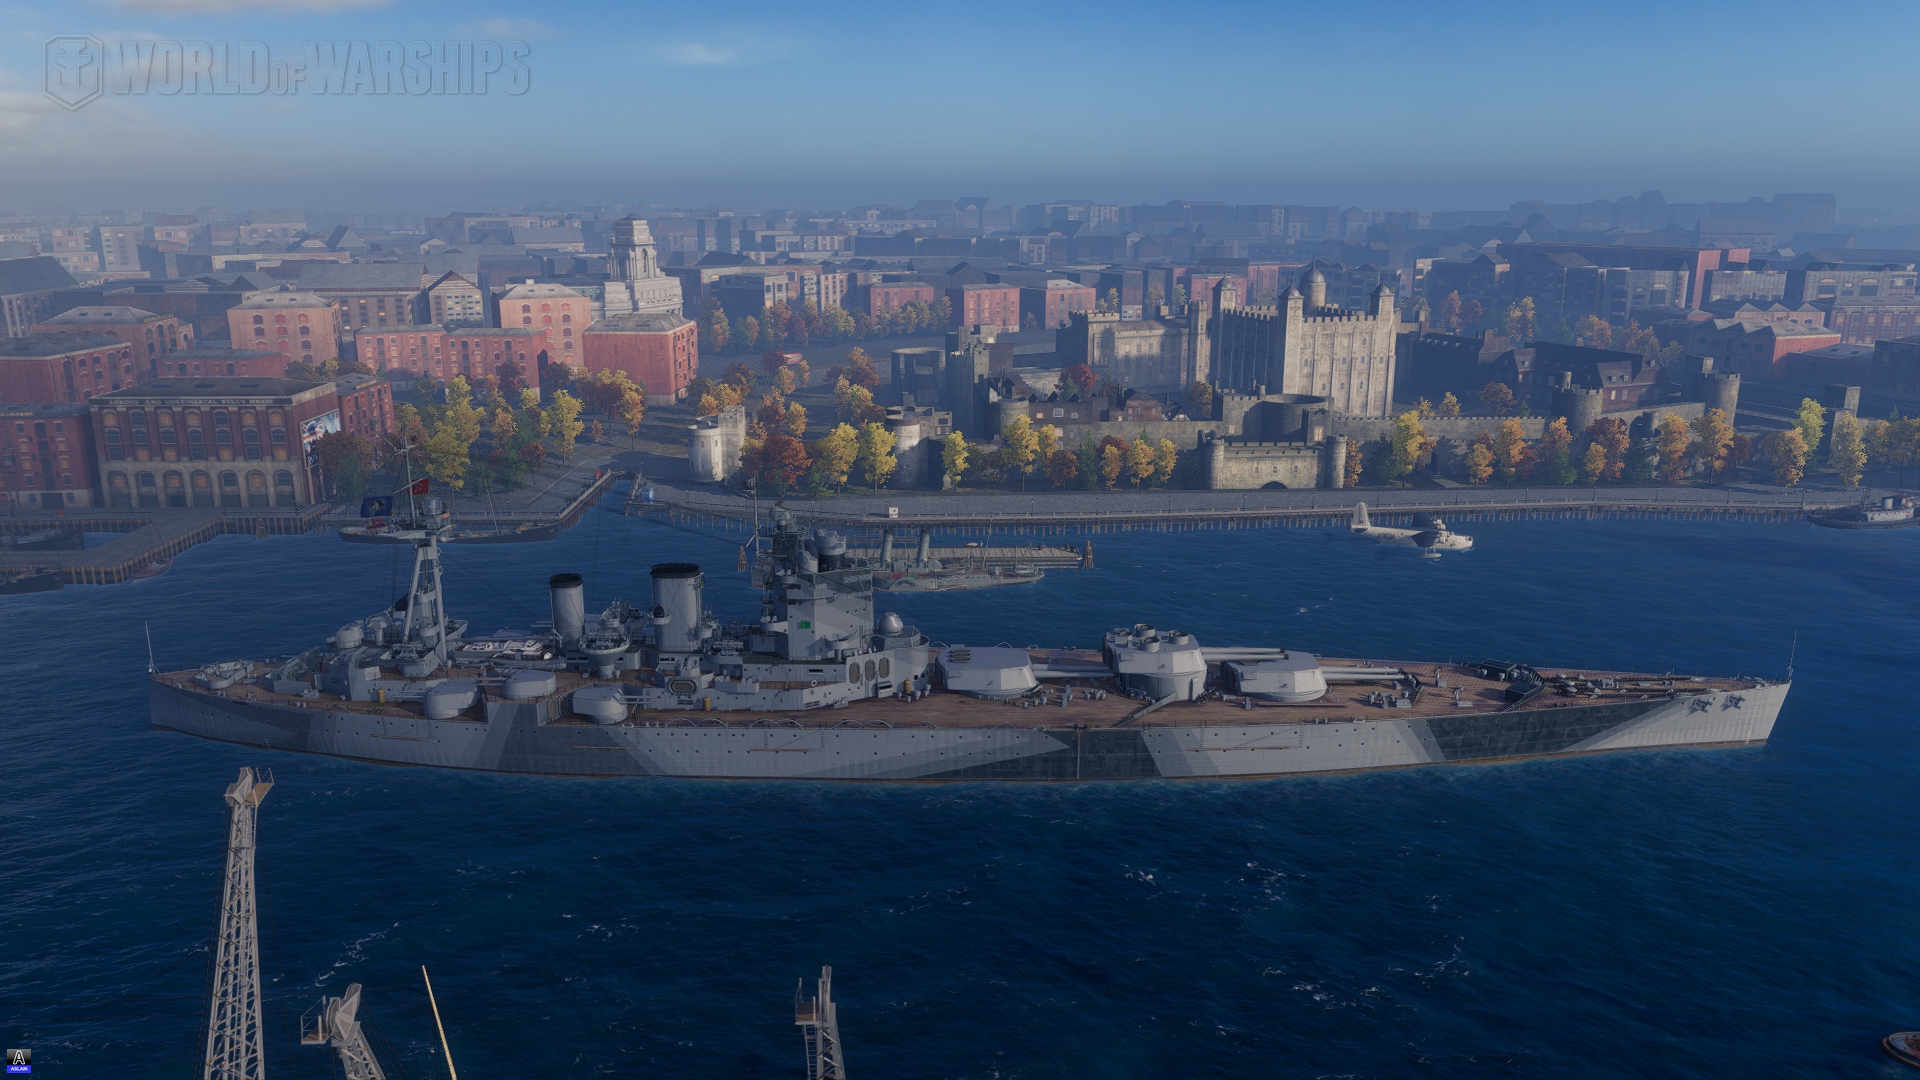
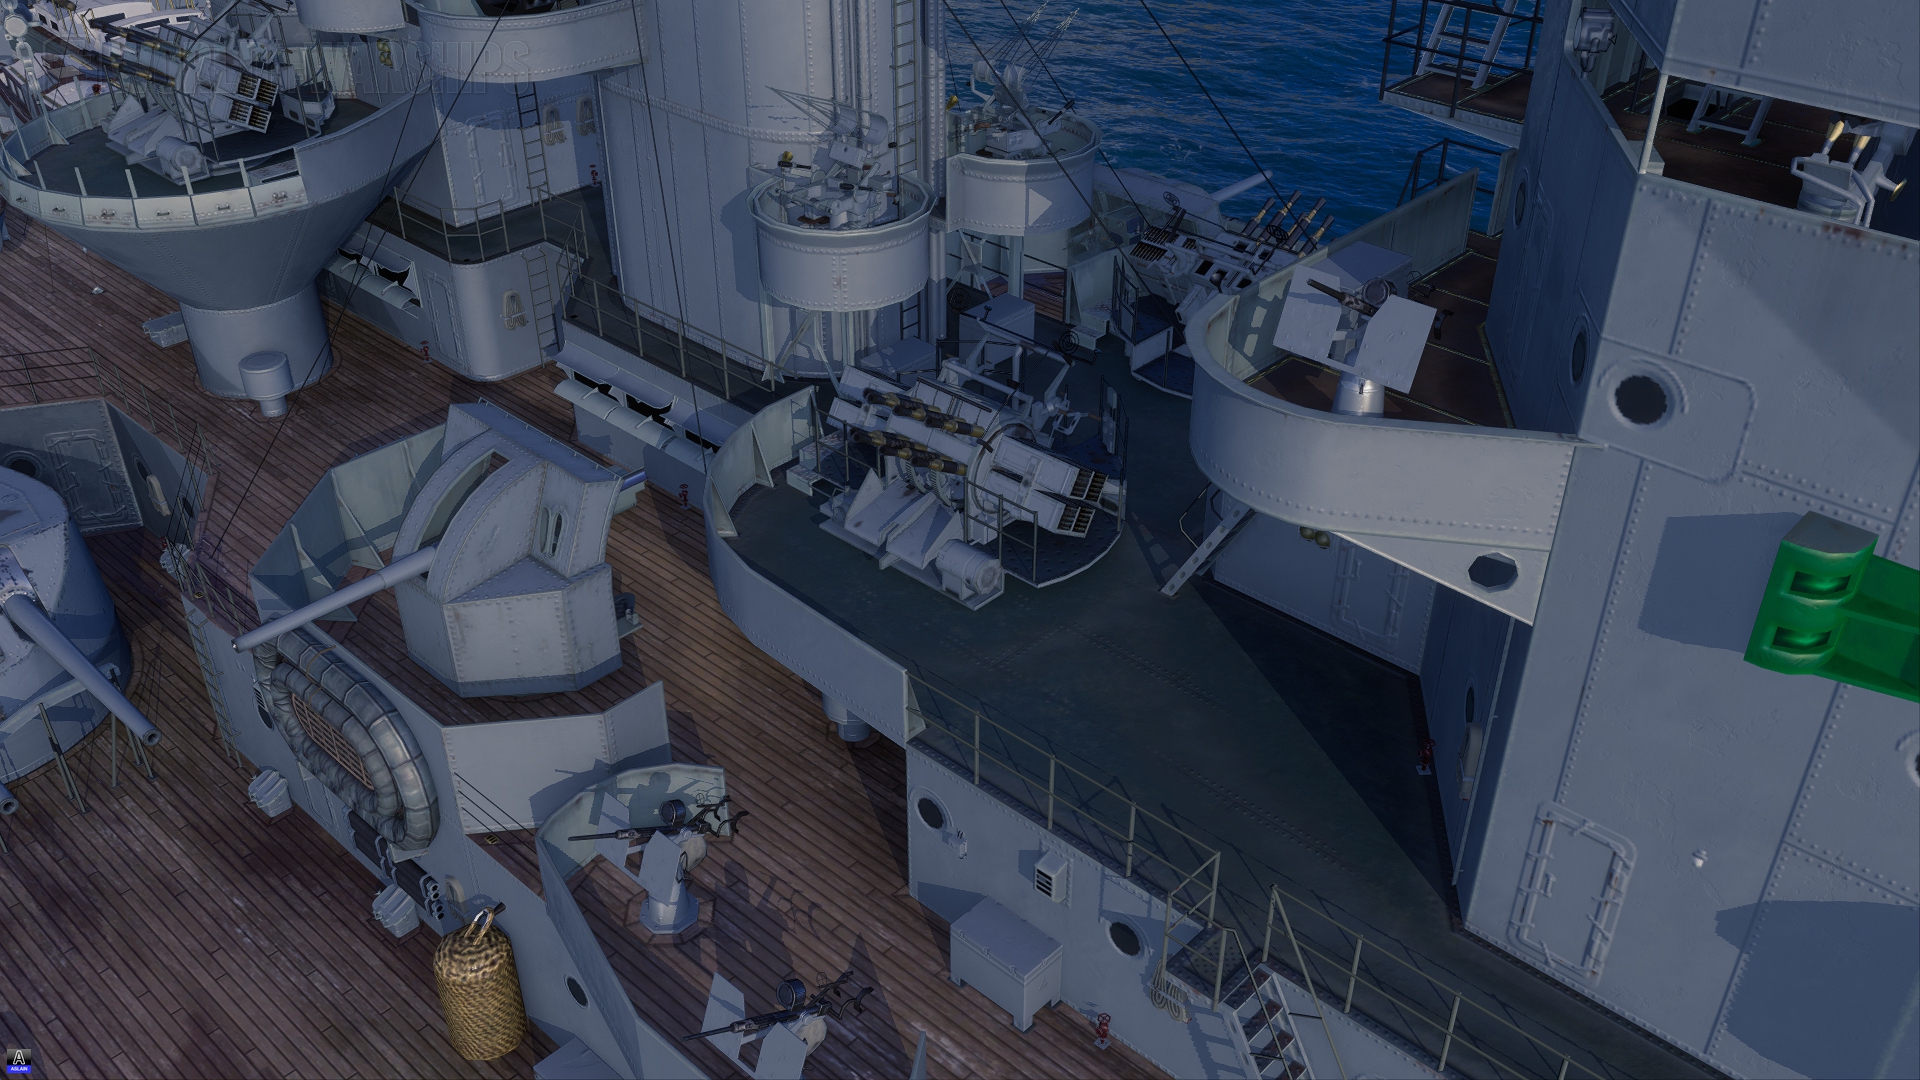
Ship’s preview
Ship’s commemorative flag

The camouflage
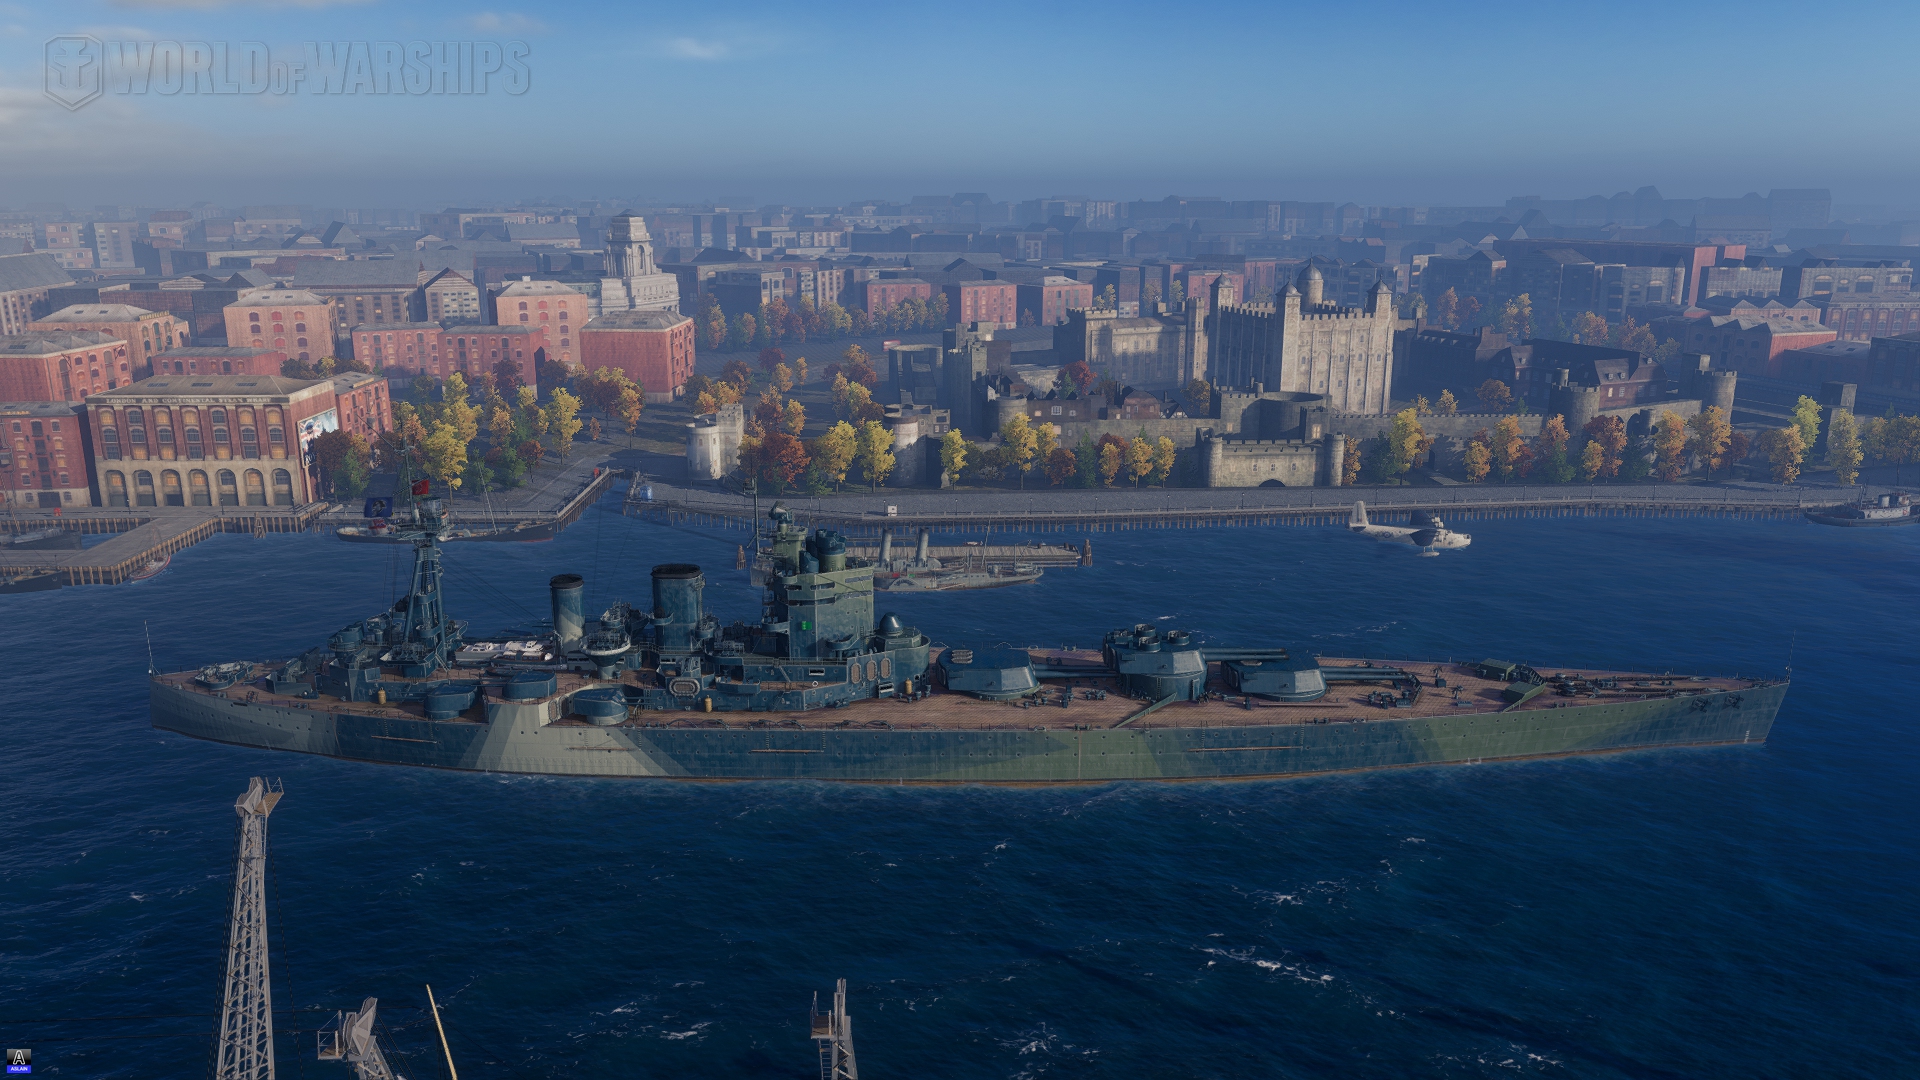
The permanent camouflage of the Collingwood comes with the standard permanent tier VII economy bonuses:
- +5% credits
- +50% XP
- +50% Commander XP
- +50% Free XP
The Good and the Bad
The Good
- 419 mm guns, the biggest caliber at tier VII
- All forward main battery with great firing angles
- 2.0 sigma
- Strong HE shells and high fire chance
- High AP penetration compared to other tier VII battleships
- Access to Main Battery Reload Booster consumable
- Access to Hydroacoustic Search
- Improved Repair Party
The Bad
- Standard battleship dispersion
- Only six guns
- Poor turret traverse speed
- Poor maximum speed of 25 knots
- Takes ages to accelerate
- Bleeds a lot of speed when turning
- Covered with 26 mm plating on the hull
- Large citadel and with rather thin protection
- Above water citadel
Modules
Hull | Engine | Gun Fire Control System | Main battery |
Collingwood |
Propulsion: 44 400 HP |
Mk VII mod. 1 | 419 mm/45 Mk.I in a turret |
General Characteristics and Playstyle
| Tier | VII |
| Health | 58 500 HP |
| Torpedo Damage Reduction | 10 % |
| Displacement | 40 492 tons |
| Dimensions | |
| Overall length | 229.7 m |
| Beam | 32.6 m |
| Overall height (keel to the highest point on the ship) | 28.8 m |
| Freeboard | 7.42 m |
| Main Armament | |
| Maximum Firing Range | 19.070 km |
| 419 mm/45 Mk.I in a turret | 3 x 2 419 mm |
| Secondary Armament | |
| Maximum Firing Range | 5.600 km |
| 152 mm/50 BL Mk.XXII on a Mk.XVIII mount 120 mm/40 QF Mk.VIII on an HA Mk.XII mount | 6 x 2 152 mm 6 x 1 120 mm |
| Maximum speed | 25.0 knots |
| Turning Circle Radius | 800 m |
| Rudder Shift Time | 14.8 s |
| Surface Detectability | 14.58 km |
| Air Detectability | 11.03 km |
| Detectability After Firing Main Guns in Smoke | 14.49 km |
| Consumables | |||
Slot 1 | Slot 2 | Slot 3 | Slot 4 |
Damage Control Party  Work time: 15 s Work time: 15 sCooldown: 80 s | Repair Party  Number of charges: 4 Number of charges: 4Work time: 28 s Cooldown: 60 s HP regeneration speed: +0.6%/s Casemate damage regeneration: 50% Citadel damage regeneration: 10% | Hydroacoustic Search  Number of charges: 3 Number of charges: 3Work time: 100 s Cooldown: 120 s Torpedo spotting range: 3.0 km Ship spotting range: 4.0 km | Main Battery Reload Booster  Number of charges: 4 Work time: 25 s Cooldown: 120 s Effect: -50% Main battery reload time |
Collingwood has been… quite a dreadful experience. It is basically “What if we took Nelson but made it completely rubbish?”. The ship is incredibly sluggish, handles like an oil tanker, is massive in size, has very little armor protection, and to add insults to injuries, has an unreliable main battery.
This thing has pretty much only two redeeming features and it’s her access to the Main Battery Reload Booster as well as, to a lesser extent, the Hydroacoustic Search. She is quite literally on life support through the use of consumables. When you are top tier with Collingwood, it’s still alright because the 26 mm armor somewhat works and the sluggishness isn’t too much of an issue because maps are small. However, the moment you face tier VIII or IX ships, it’s a butchery. She absolutely doesn’t have the armor to tank, the mobility is abysmal, especially since she bleeds a lot of speed when turning. Also, since battleships get the 32 mm armor in most cases, her large caliber guns lose any sort of impact, even against some cruisers.
If you want to see the ship in action, here is a commented replay:
Main Armament
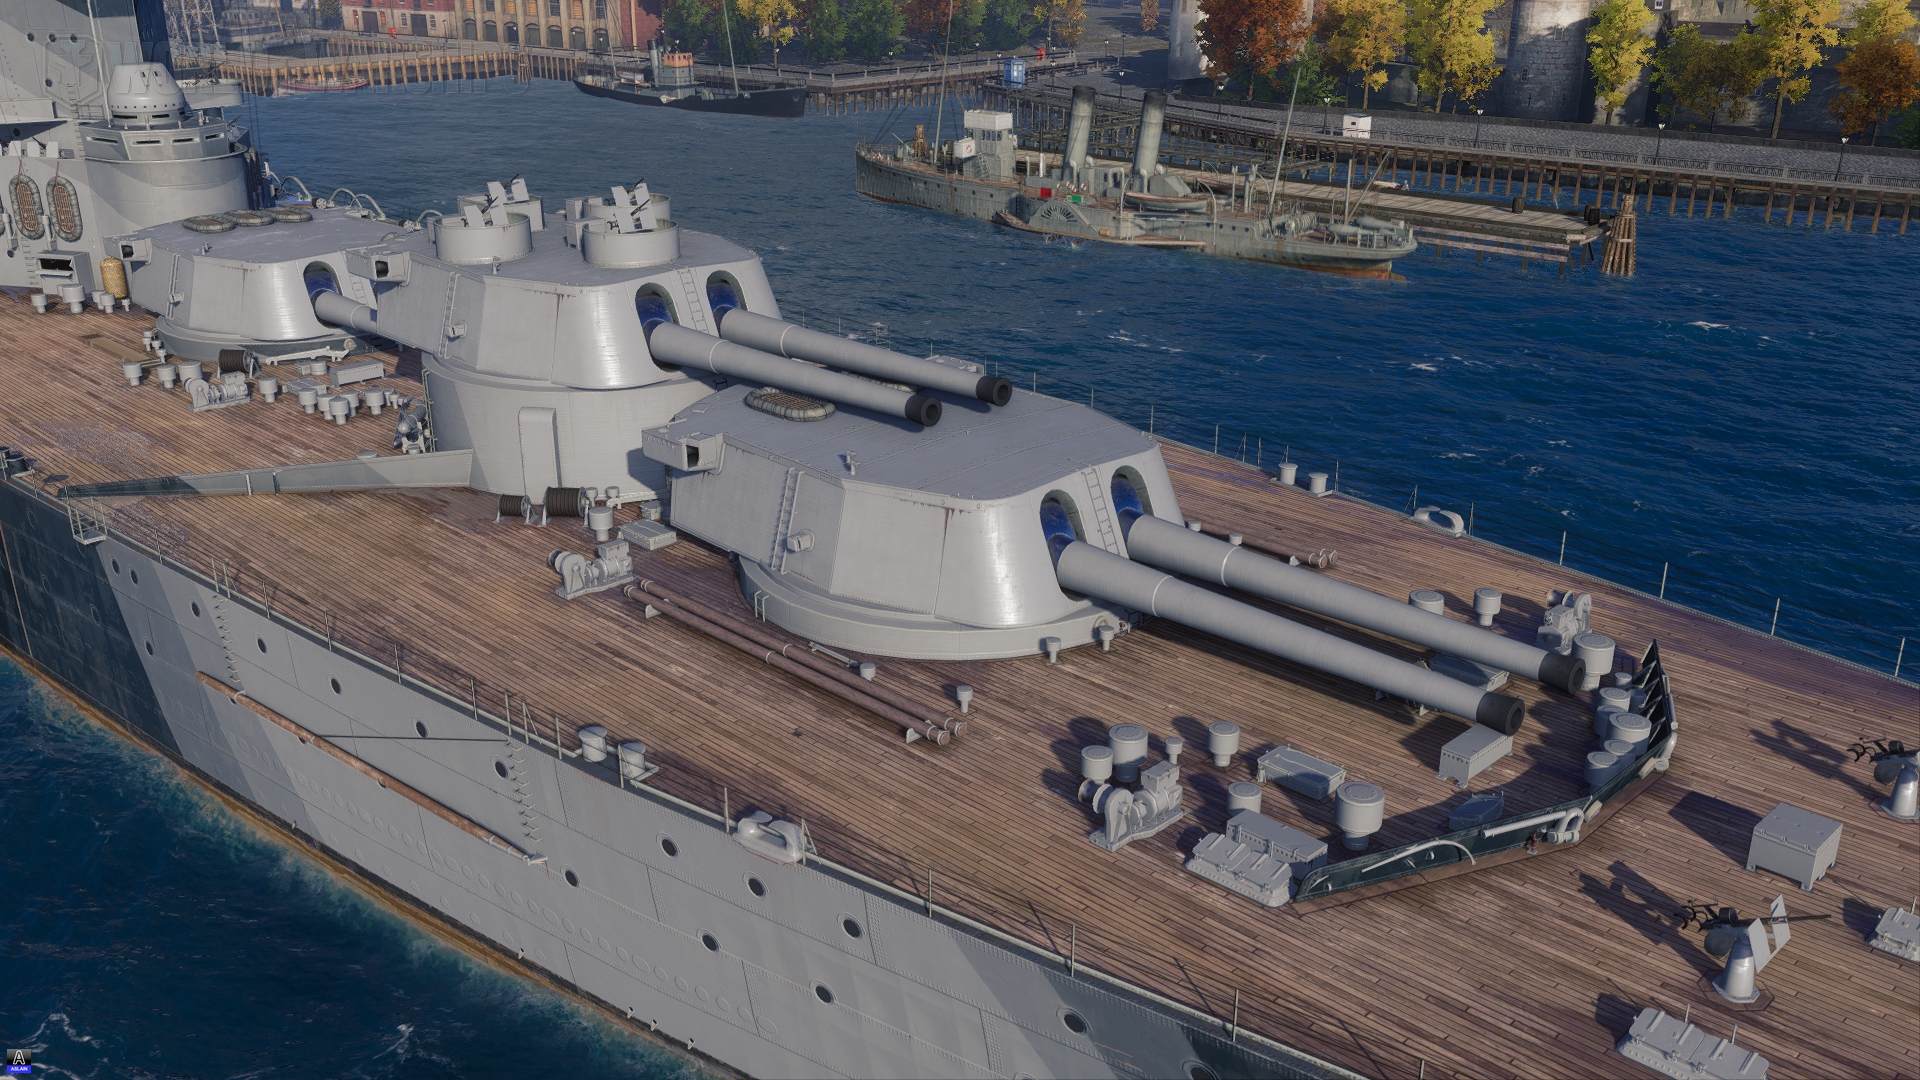
| 3 x 2 419 mm/45 Mk.I in a turret Turret n°2 can rotate at 360° | |
| Maximum Firing Range | 19.070 km |
| Reloading Time | 26.0 s |
| 180 Degree Turn Time | 45.0 s |
| Optimal firing angles at the front | 25° |
| Optimal firing angles at the rear | 28° |
| Sigma | 2.0 sigma |
| Maximum Dispersion | 251 m |
| Shells | |
| Type of Projectile | HE – 419 mm HE Mk I |
| Alpha Damage | 6 150 |
| Penetration capacity | 70 mm |
| Explosion size | 2.73 |
| Fire chance | 47 % |
| Projectile Speed | 792 m/s |
| Air Drag | 0.31 |
| Projectile Mass | 995.0 kg |
| Type of Projectile | AP – 419 mm AP Mk II |
| Alpha Damage | 13 000 |
| Projectile Speed | 747 m/s |
| Air Drag | 0.34 |
| Projectile Mass | 1 157.0 kg |
| Projectile Krupp | 2 548 |
| Projectile Detonator | 0.033 s |
| Detonator threshold | 70 mm |
| Ricochet Angles | 45° – 60° |
The main battery of Collingwood lives and dies with the Main Battery Reload Booster. In a similar fashion to Gneisenau, the ship is stuck with only six guns while having standard battleship dispersion. Even when considering that the ship has the same guns as Lion and below-average reload time, this main battery remains one of the worst at tier VII. Its only saving grace is the Main Battery Reload booster lasting for 25 seconds. Thanks to this booster, you can get a much-needed damage burst. If the dispersion doesn’t screw you over (it will happen often), it might be a game-changer.
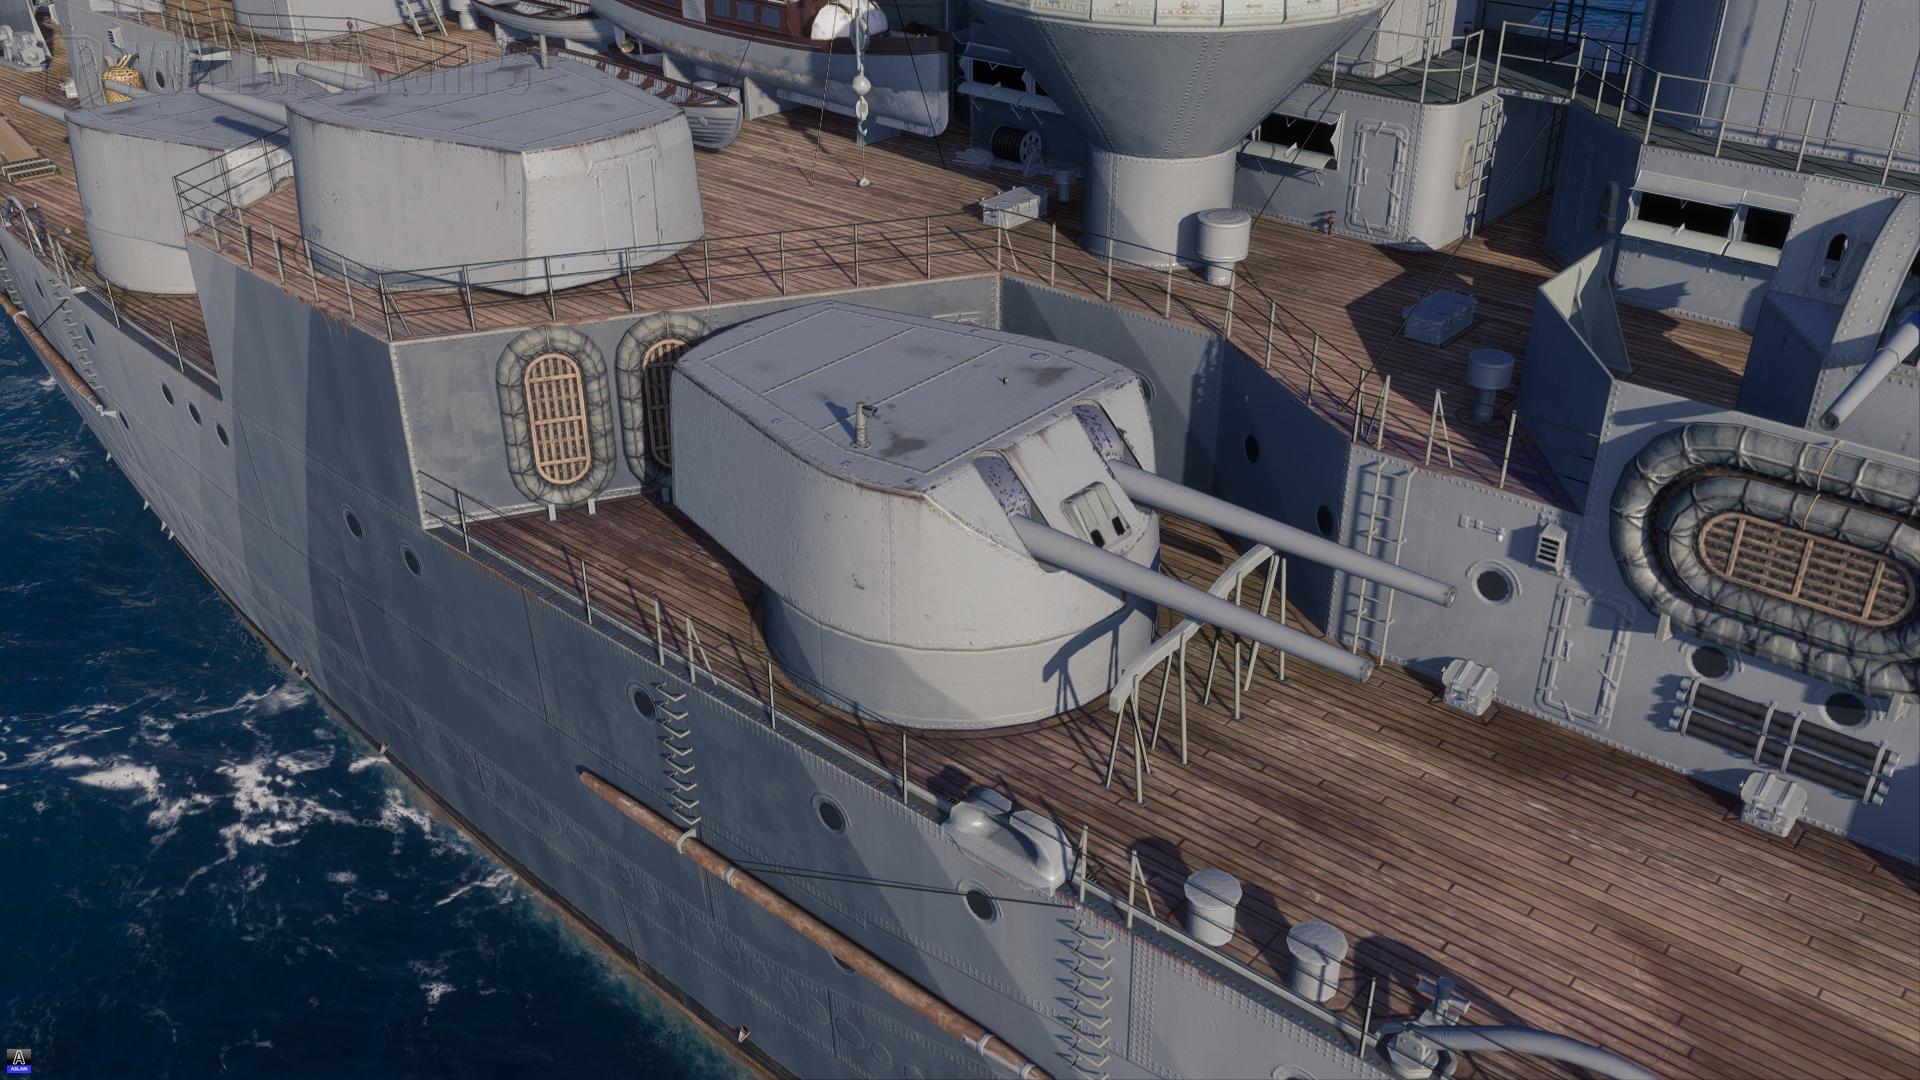
Secondary Armament
| 6 x 2 152 mm/50 BL Mk.XXII on a Mk.XVIII mount | |
| Maximum Firing Range | 5.600 km |
| Reloading Time | 12.0 s |
| Sigma | 1.0 sigma |
| Shells | |
| Type of Projectile | HE – 152 mm HE Mk V |
| Alpha Damage | 2 150 |
| HE penetration | 25 mm |
| Explosion Size | 0.54 |
| Chance to Cause Fire | 9 % |
| Projectile Speed | 884 m/s |
| Air Drag | 0.362 |
| Projectile Mass | 50.8 kg |
| 6 x 1 120 mm/40 QF Mk.VIII on an HA Mk.XII mount | |
| Maximum Firing Range | 5.600 km |
| Reloading Time | 5.0 s |
| Sigma | 1.0 sigma |
| Shells | |
| Type of Projectile | HE – 120 mm HE Mk VA |
| Alpha Damage | 1 700 |
| HE penetration | 20 mm |
| Explosion Size | 0.4 |
| Chance to Cause Fire | 8 % |
| Projectile Speed | 749 m/s |
| Air Drag | 0.384 |
| Projectile Mass | 22.68 kg |
The secondaries of Collingwood are nothing impressive with only a nine-guns broadside. Also, the 152 mm batteries have a long reload time which doesn’t help.
Anti-air Armament
| 6 x 1 120 mm/40 QF Mk.VIII on an HA Mk.XII mount | |
| Sector range | 0.1 km – 5.2 km |
| Hit chance | 75 % |
| Sector’s damage | 14 |
| Sector’s damage frequency | 0.29 s |
| Sector’s damage per second | 49 |
| Flak clouds number | 1 |
| Flak cloud damage | 1 260 |
| 6 x 8 40 mm/39 Vickers QF Mk.VIII on a Mk.VI mount | |
| Sector range | 0.1 km – 2.5 km |
| Hit chance | 75 % |
| Sector’s damage | 66 |
| Sector’s damage frequency | 0.29 s |
| Sector’s damage per second | 231 |
| 24 x 1 20 mm Oerlikon Mk.I on a Mk.IIA mount | |
| Sector range | 0.1 km – 2.0 km |
| Hit chance | 70 % |
| Sector’s damage | 57 |
| Sector’s damage frequency | 0.29 s |
| Sector’s damage per second | 200 |
The anti-air of Collingwood is absolutely nothing to write home about. The long-range aura is mediocre and when it comes to the medium and close-range auras, their firing range is just too short to have any sort of meaningful impact.
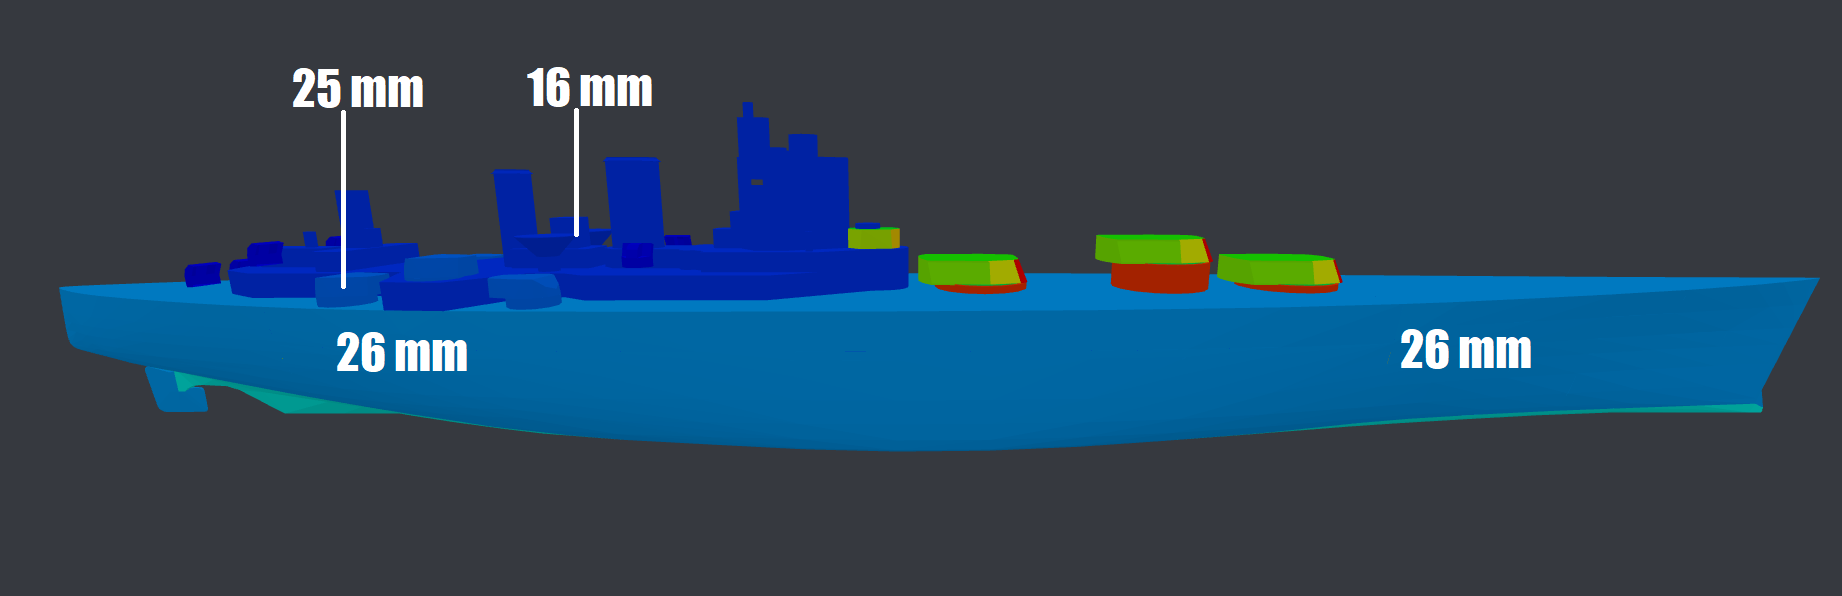
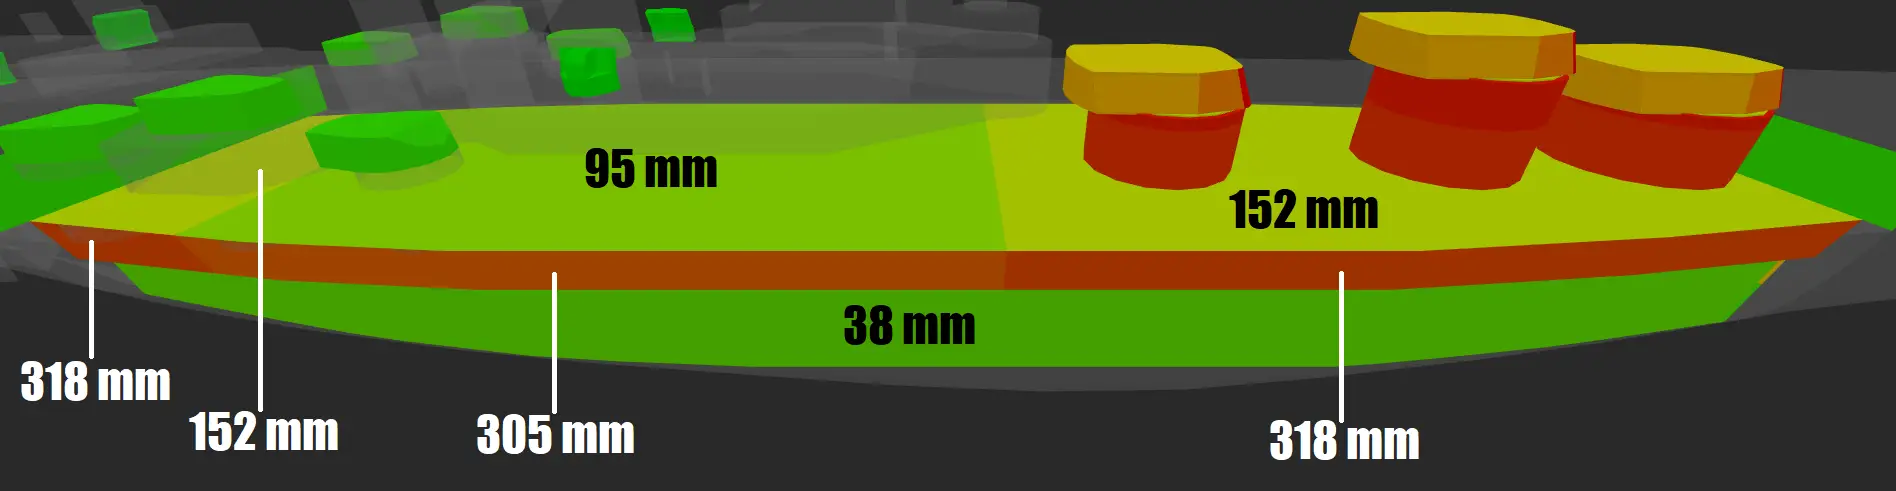
The Armor
The armor protection of Collingwood is one of the worst at tier VII. The ship is entirely covered with 26 mm platings. This means that the major part of the battleships that she can face will be able to overmatch her hull.
Also, the citadel itself sits high above the water and has rather thin armor protection.
External armor protection:
Front and rear armor protection of the middle section:
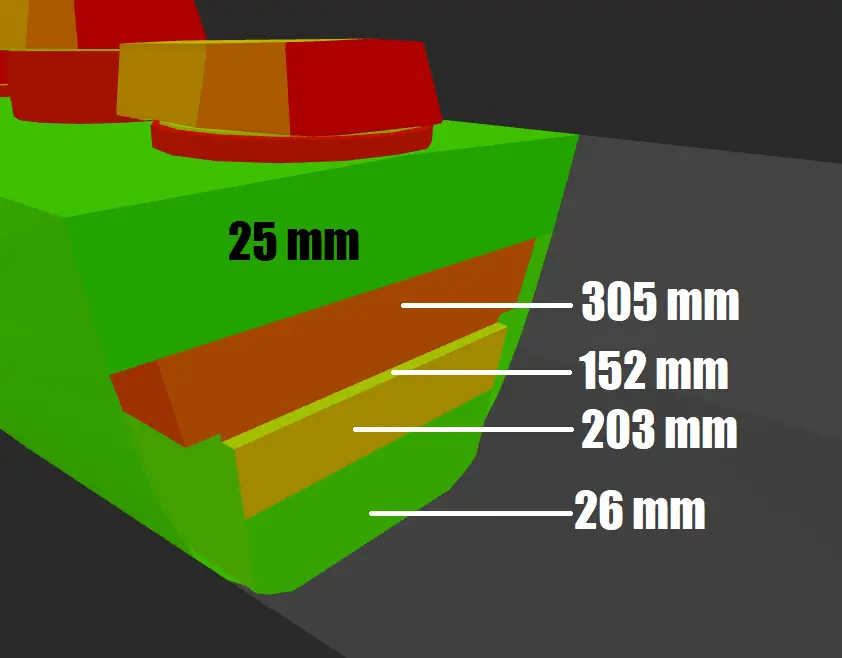
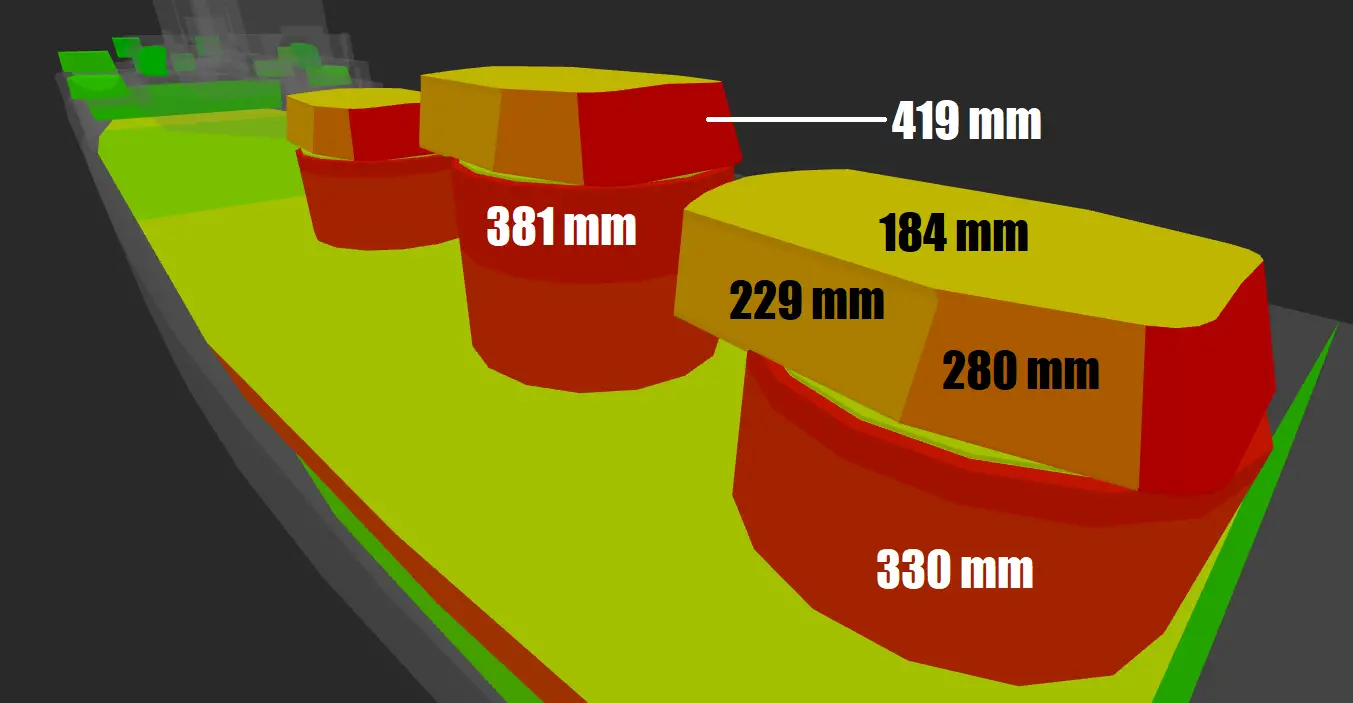
Citadel armor protection:
Turrets armor protection:
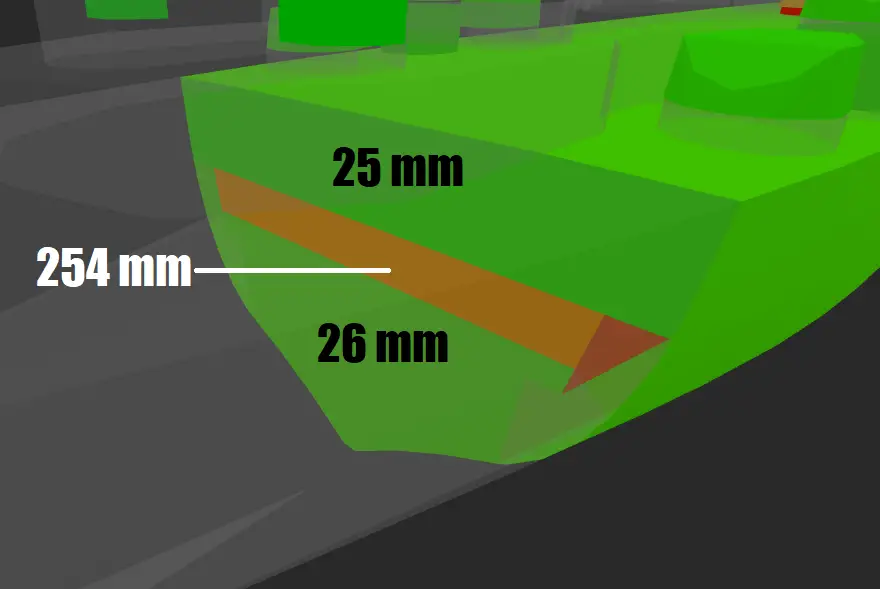
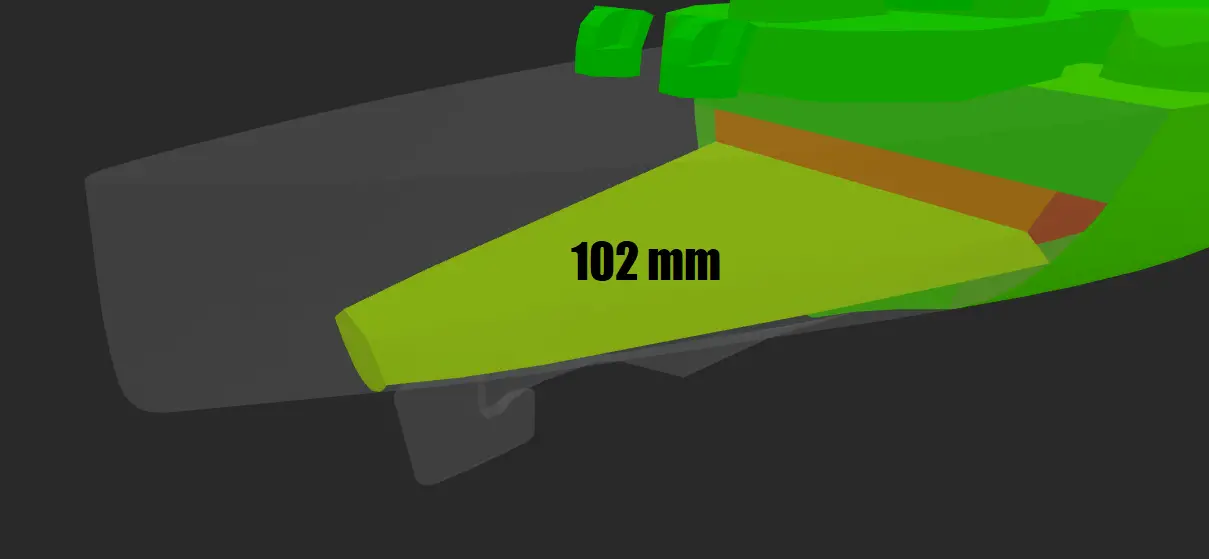
Hidden armor protection inside the stern:
Final Opinion
Basically, unless you are able to find a magic trick that makes you top tier every game, I heavily recommend you to avoid Collingwood.
It is fat, it’s sluggish, it has massive armor weaknesses, the turret handling is bad and the firepower pretty much lives and dies with the Main Battery Reload Booster. If you get her in the random bundles, I’m honestly not sure if you should consider lucky or not. One thing is for sure, Toulon will have some company at the bottom of the food chain at tier VII.
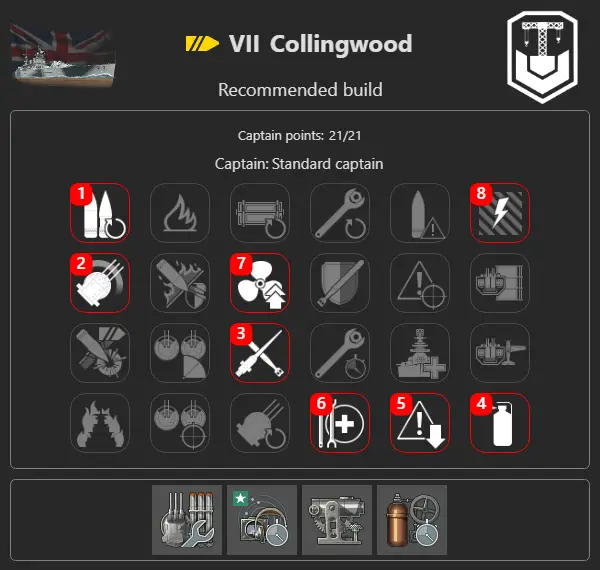
Recommended Build
For the Collingwood, I recommend the following commander build and upgrades:
This concludes my review of the Collingwood. Thank you for reading this article!
Don’t hesitate to subscribe to our notifications to ensure you don’t miss any future articles.
Have a good one and see you soon!
Also if you are new to the game or want to get back to it, feel free to use my Recruiting Station code for free goodies such as Premium ships, premium time, and more: https://warships.net/yuzorah
Have a good one and see you soon!


I suppose the “magic trick” would be scenarios, in which case there’s probably still better (Bri’ish) choices to be had.
The fact you have to gamble to even get her is even sadder.