World of Warships Final Review: Soviet Tier VII Premium Destroyer Tashkent ’39
10 min read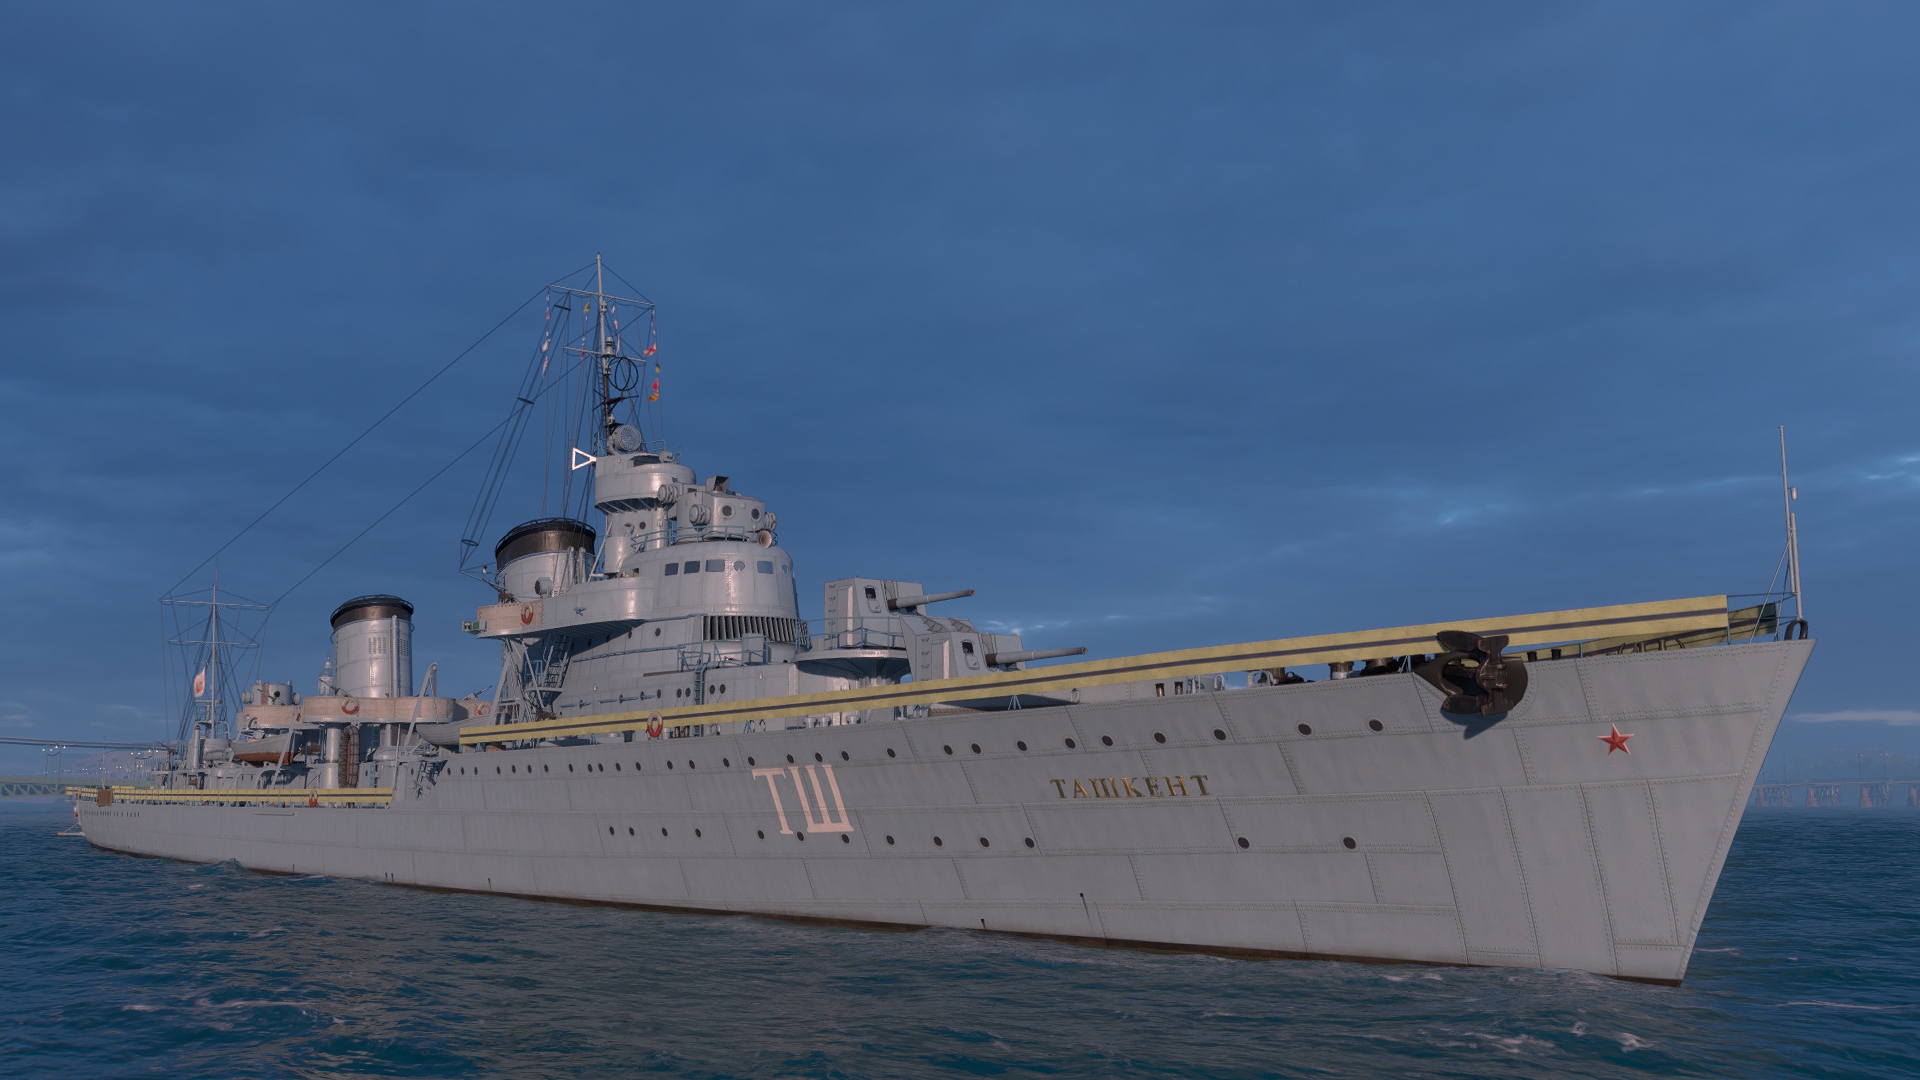
Ladies and Gentlemen, a ship that has been asked for by a lot of history fans is soon going to be released. Tashkent ’39 will be part of a special event called “Marine Stock Exchange”. During this event, you will be able to exchange resources for tokens, and by spending doubloons, the exchange rate will be improved. With these tokens, you will be able to buy three different Tier VII premium ships: British battleship Hood, Italian cruiser Gorizia, and obviously, Soviet destroyer Tashkent ’39.
I am currently unable to tell when she will be available in the Premium shop or for doubloons in the Armory.
Is she worth it? Is she an interesting torpedo destroyer with her unique design? Here is my opinion.
Historical background
Tashkent was the lead ship of a class of destroyer leader officially named Project 20. Due to the disappointing results of the previous Leningrad-class and the general degradation of Soviet expertise in shipbuilding, the USSR decided to get some help from Italy. The plan was to build the first unit of the new class of destroyer in an Italian dockyard and the others would be built in Soviet dockyards with technical assistance from the Italians. However, only Tashkent would ever be constructed as the others proved to be too difficult to build for the existing Soviet shipyards at the time.
When it comes to Tashkent herself, she was laid down in January 1937, launched in December 1938, and “completed” in October 1939. However, her proper main armament still needed to be installed. While it was meant to consist of six 130 mm guns in three twin turrets, the said turrets could not be ready in time. As a temporary solution, she was fitted with older single 130 mm mounts. Also, because she was painted of a distinctive blue-grey color by the Italians, she was nicknamed “Blue Cruiser”.
During the first part of her life, she was assigned to the Black Sea Fleet in October 1940. It was during her refit in the early half of 1941 which saw her receiving her intended main battery that Germany fired up Operation Barbarossa. She was then transferred to Sevastopol, being attacked twice by German aircraft on the way. Tashkent was then deployed to bombard German positions with a small break to escort a troop transport towards Odessa where she remained for a while to provide gunfire support. However, she was badly damaged by near-misses from three enemy bombers. Fortunately, Tashkent was able to reach Sevastopol for repairs under her own power. She was then put in drydock until the beginning of November.
After returning to active duty, the ship would take part in numerous shore bombardment operations during the Siege of Sevastopol as well as both bringing in troops and ammunitions but also evacuating wounded and civilians.
The ship was later attacked by numerous German bombers while she was carrying around 2 100 wounded toward Novorossisk. Even though she was never hit directly, the numerous near-misses still caused serious damage and she required to be towed to reach her destination. This is where she would remain as on the 2nd of July 1942, whilst stationed in Novorossisk, she was attacked by more German bombers that managed to hit Tashkent twice, sinking her in the harbor. She was stripped of all valuable equipment with two of her turrets being transferred to the destroyer Ognevoi and the last one to Osmotritelny. Her wreck would be refloated and beached in January 1944 but the damage she suffered was far too great and so the wreck remained here until she was scrapped in 1946.
If you want to learn more about Tashkent, here is a video from Drachinfel covering the ship:
In World of Warships, we are getting Tashkent in her original (and temporary) configuration with the bare minimum to defend herself in terms of main armament.
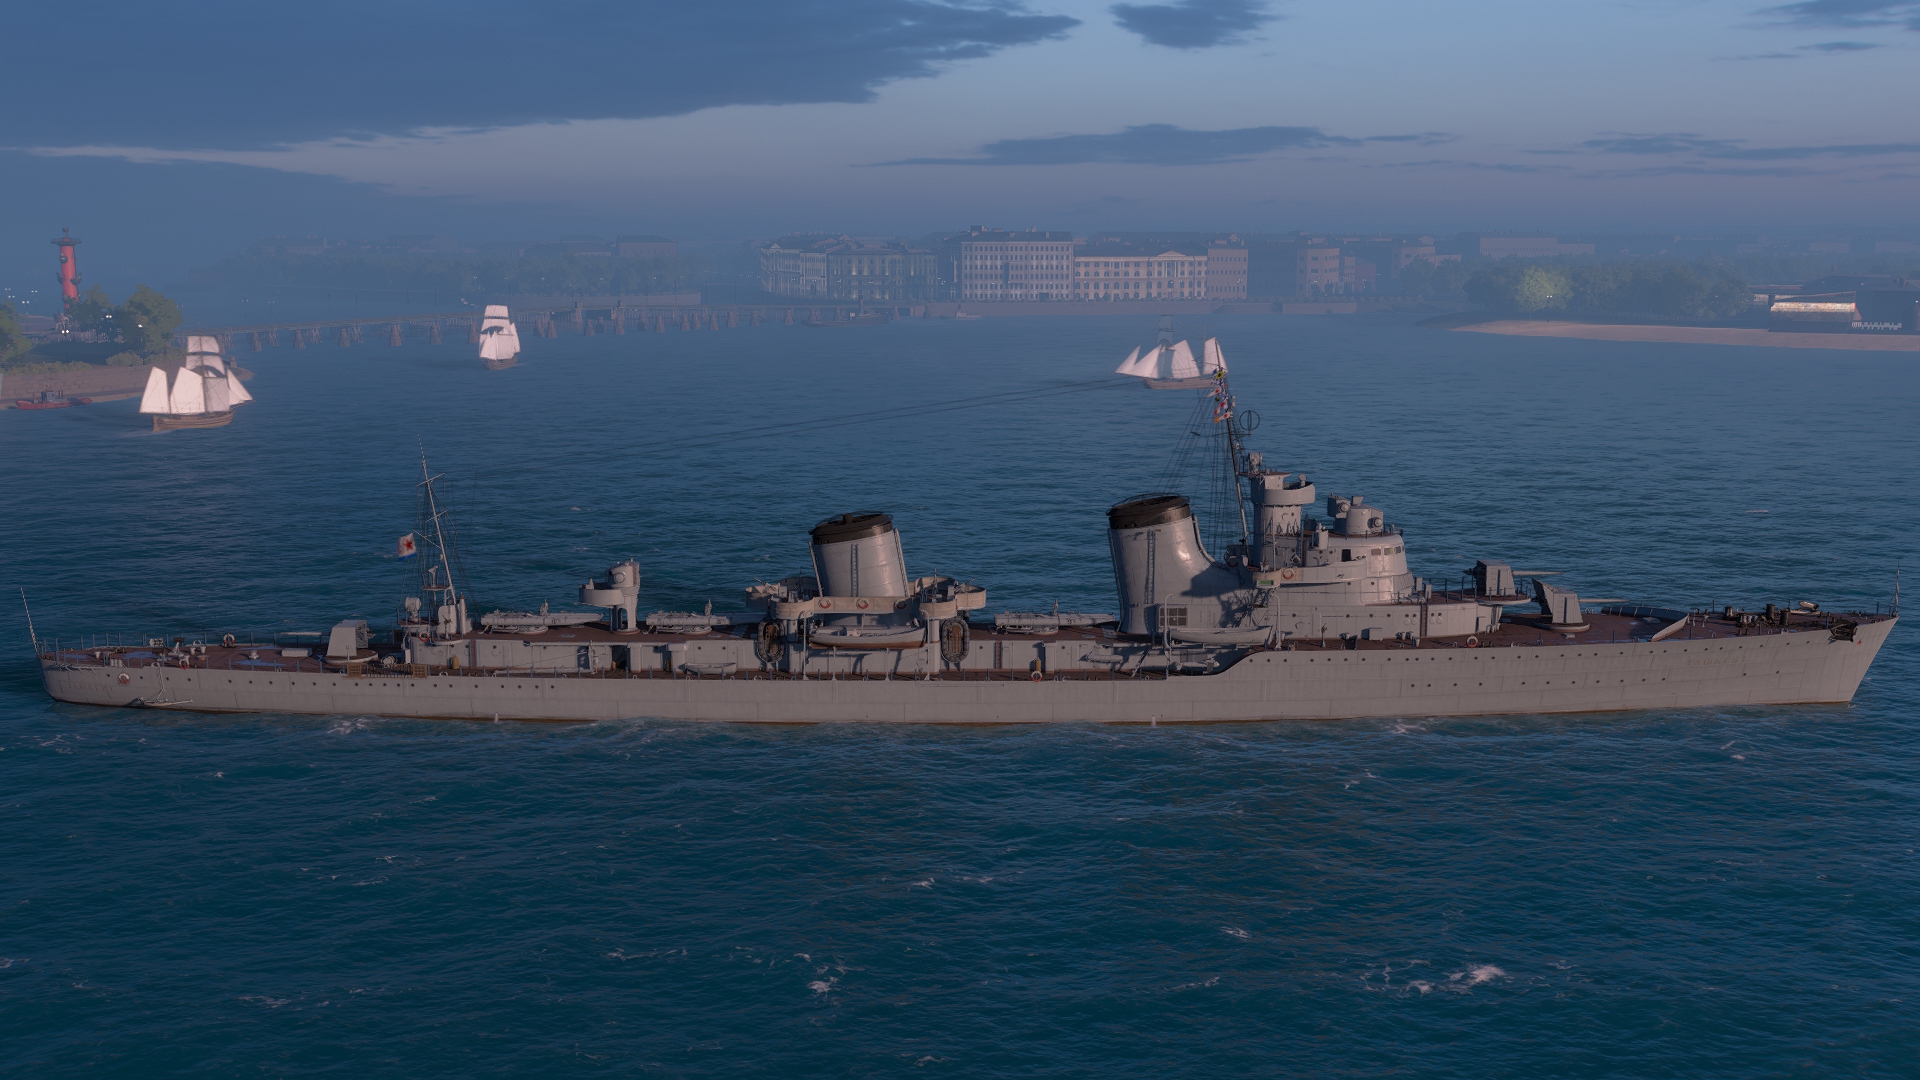
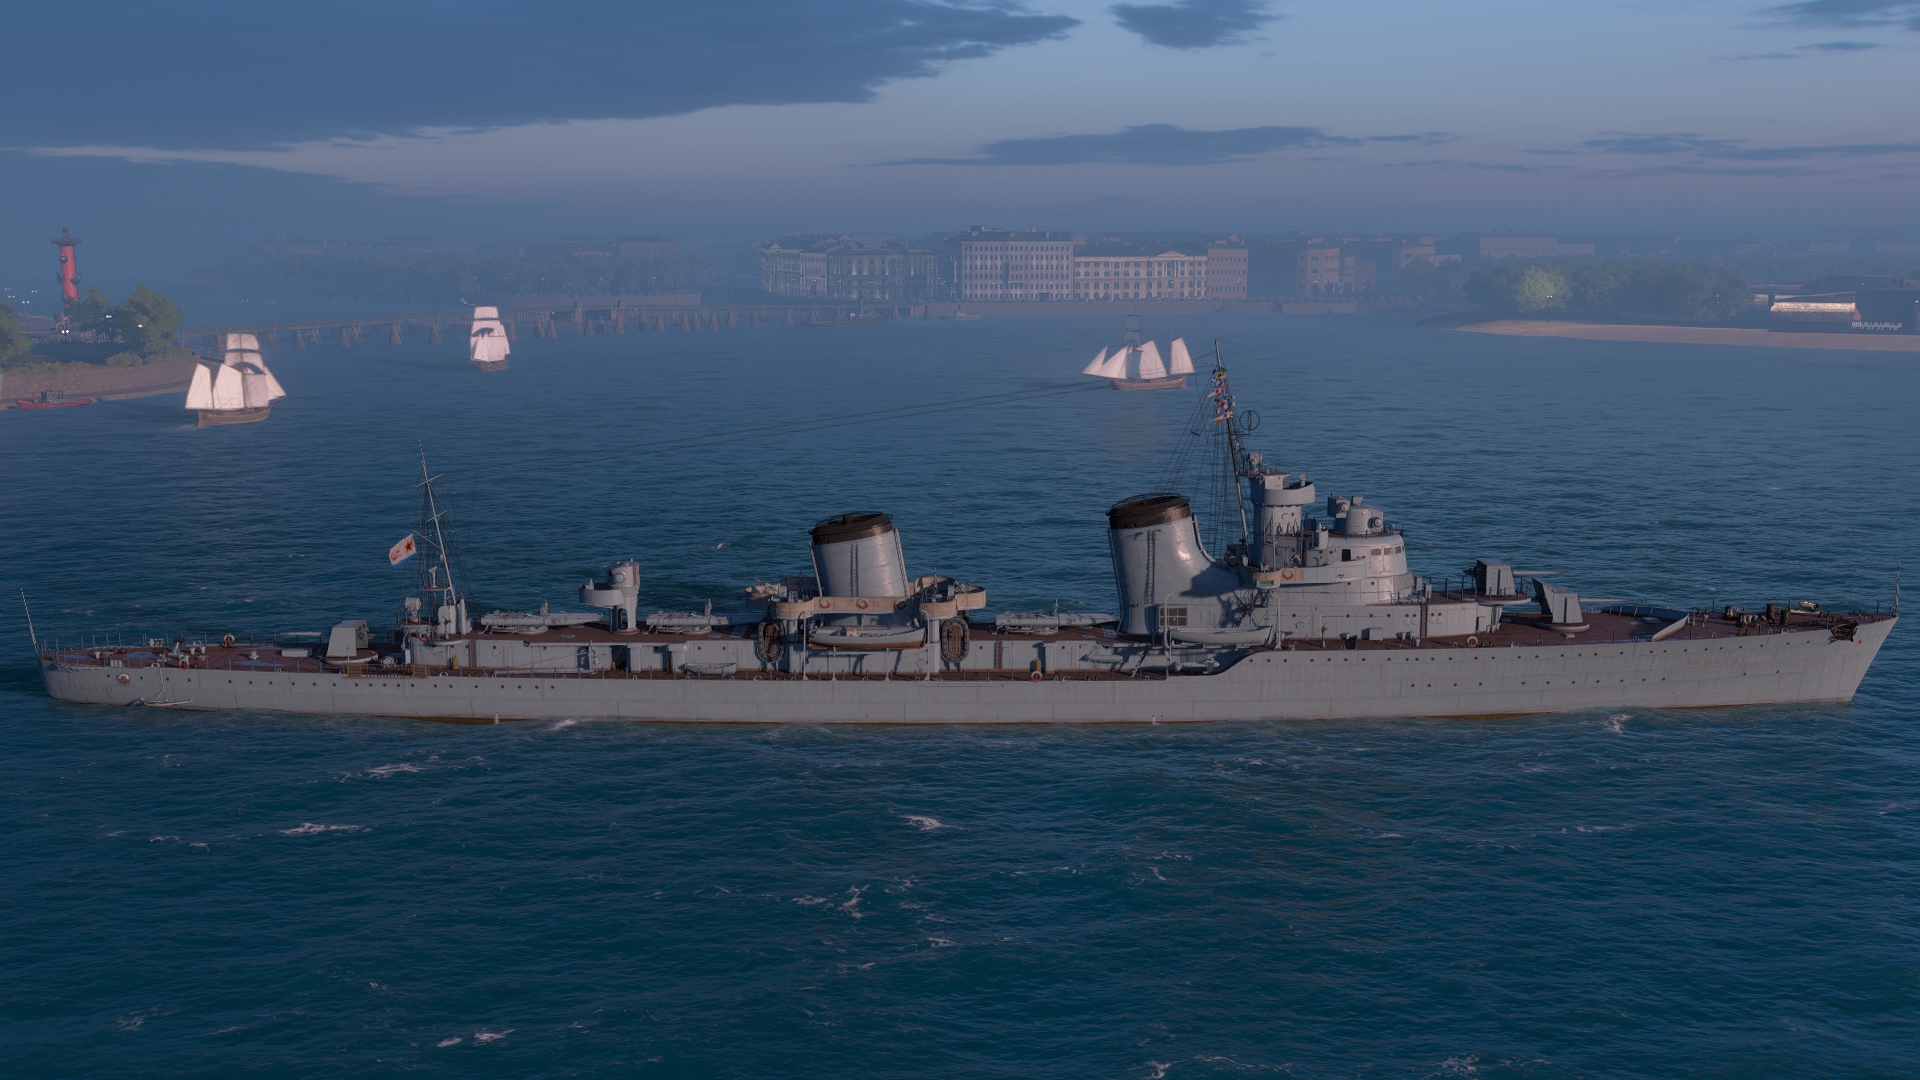
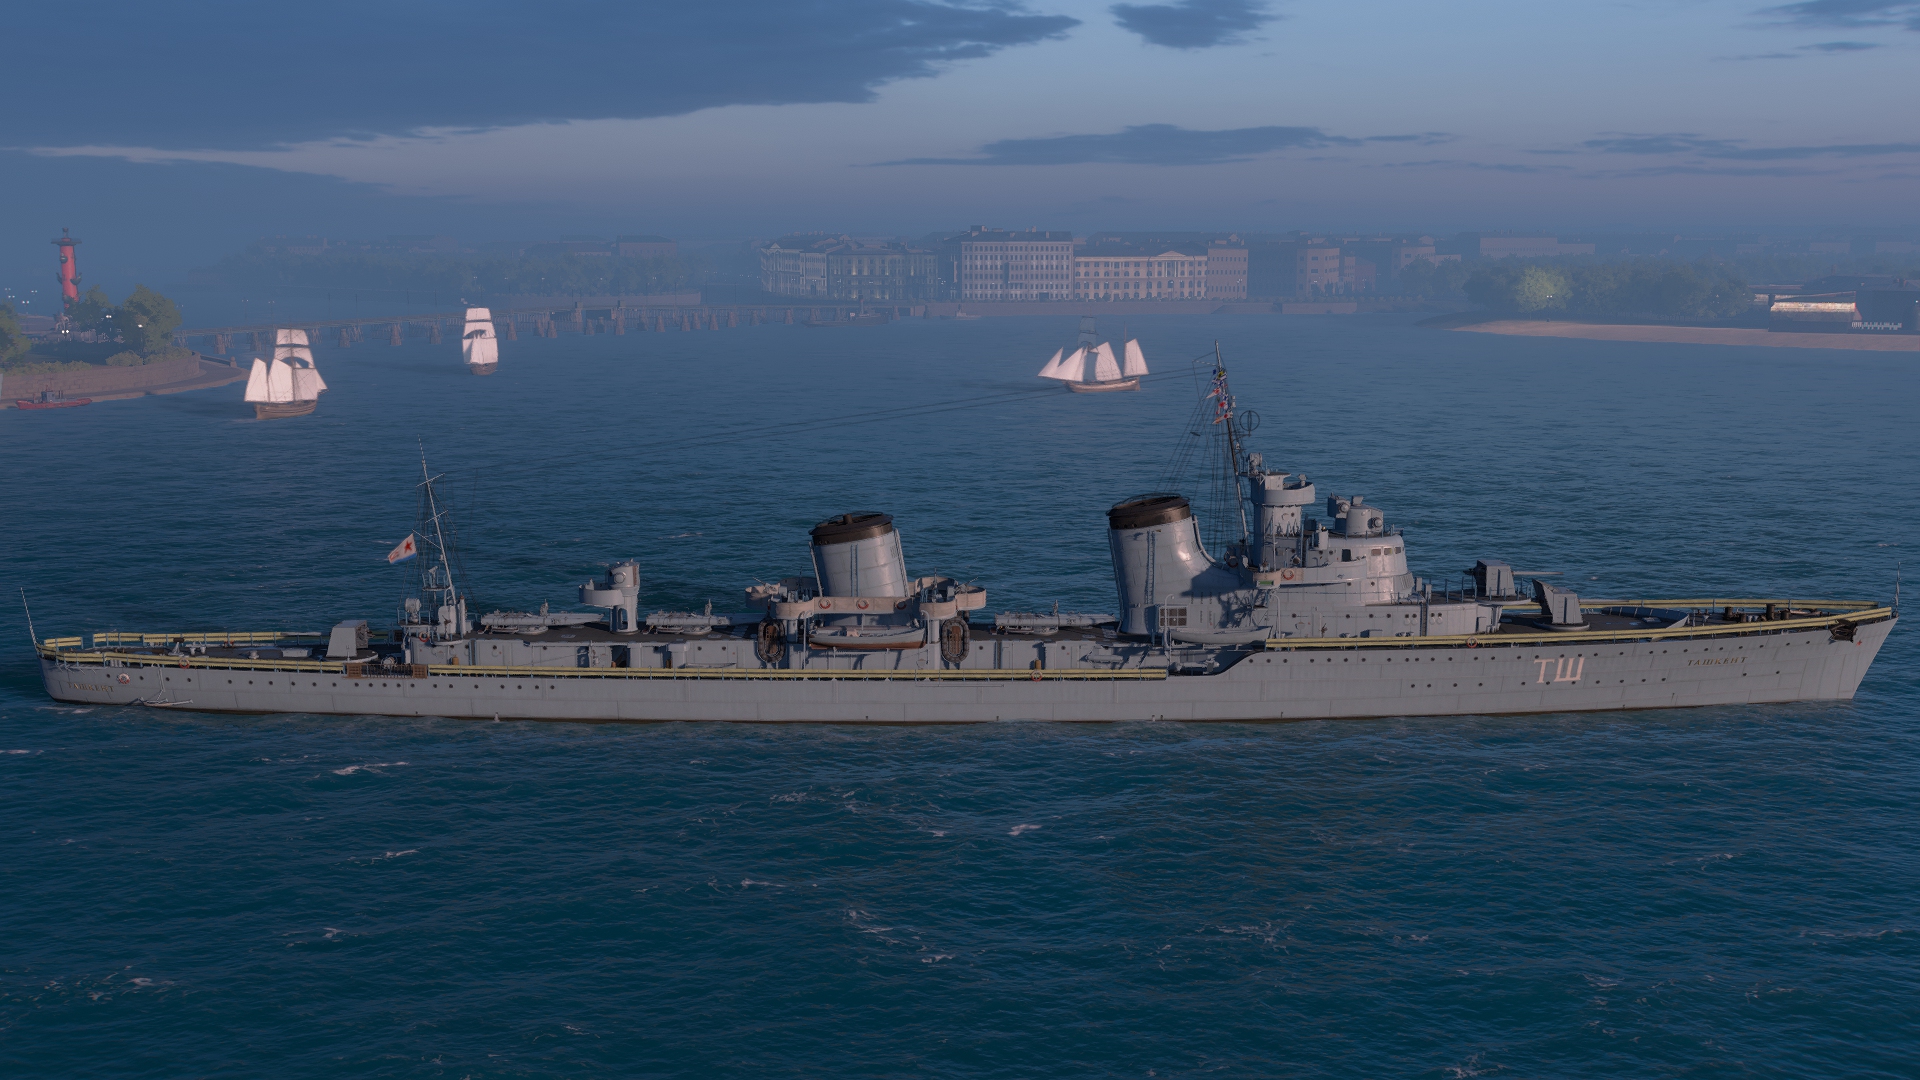
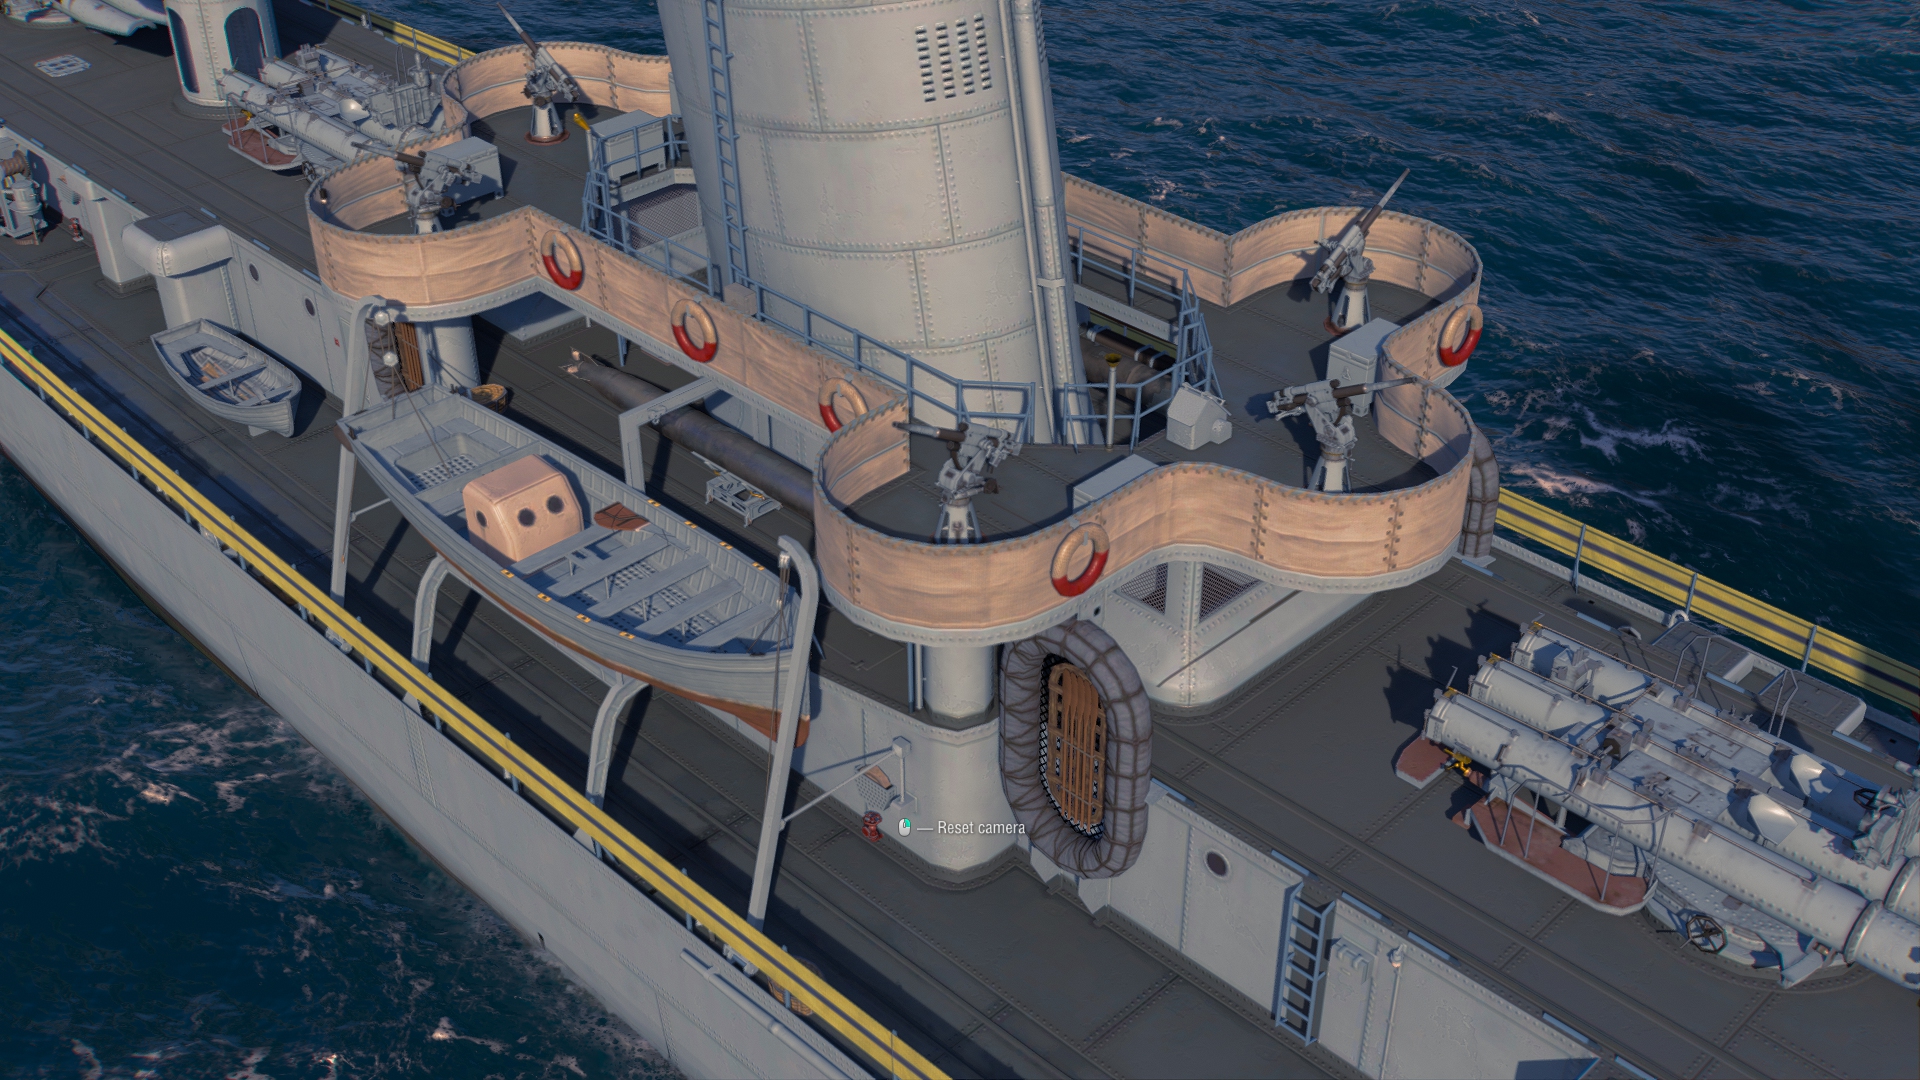
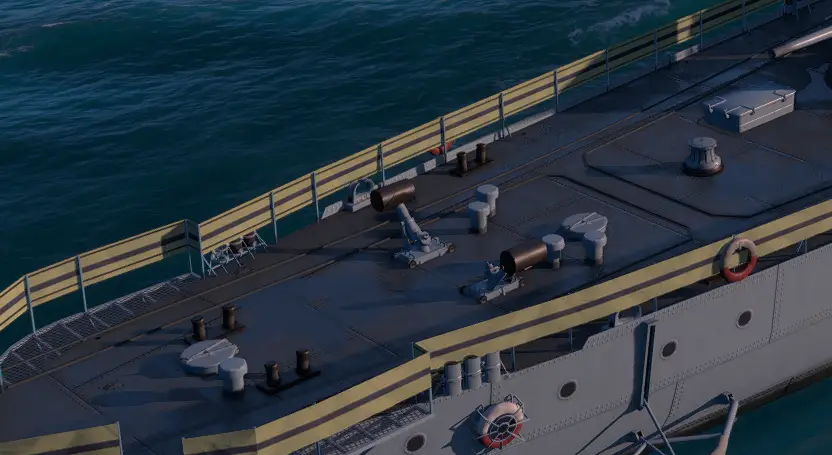
Ship’s preview
Ship’s commemorative flag

The camouflages
The permanent camouflage of Tashkent ’39 comes with the standard permanent tier VII economic bonuses:
- +5% Credits
- +50% XP
- +50% Commander XP
- +50% Free XP
The ship will also come with a special skin called “Blue cruiser”.
Yes, I know. These are some particularly beautiful camouflages with incredibly complex patterns.
The Good and the Bad
The Good
- Good firing angles
- Good gun ballistics
- Nine torpedoes per salvoes
- Low torpedo reaction time
- Good torpedo range
- Torpedoes in three separate launchers
- Access to a Torpedo Reload Booster consumable
- Highest base ship speed of the entire game
- Highest HP pool of all tier VII destroyers
The Bad
- Very weak firepower with only three guns
- Slow turret traverse
- Fairly long torpedo reload time
- Largest destroyer at tier VII by a good margin
- Laughably bad anti-air
- Largest turning radius of all tier VII destroyers
- Worst concealment by a large margin of all tier VII destroyers
- Soviet Smoke Generator Consumable with short smoke duration
Modules
Hull | Engine | Gun Fire Control System | Main battery | Torpedoes |
Tashkent ’39 |
Propulsion: 110 000 HP |
GFCS VII mod. 1 | 130 mm/50 Model 1936 on a B-13 mount |
53-38U |
General Characteristics and Playstyle
| Tier | VII |
| Health | 21 200 HP |
| Torpedo Damage Reduction | 0 % |
| Displacement | 4 163 tons |
| Dimensions | |
| Overall length | 139.7 m |
| Beam | 13.0 m |
| Overall height (keel to the highest point on the ship) | 18.4 m |
| Freeboard | 4.0 m |
| Main Armament | |
| Maximum Firing Range | 10.500 km |
| 130 mm/50 Model 1936 on a B-13 mount | 3 x 1 130 mm |
| Torpedo Armament | |
| Maximum Firing Range | 10.500 km |
| 533 mm Triple 1-N | 3 x 3 533 mm |
| Maximum speed | 44.8 knots |
| Turning Circle Radius | 730 m |
| Rudder Shift Time | 4.84 s |
| Surface Detectability | 8.42 km |
| Air Detectability | 4.06 km |
| Detectability After Firing Main Guns in Smoke | 3.37 km |
| Consumables | |||
Slot 1 | Slot 2 | Slot 3 | Slot 3 |
Damage Control Party  Work time: 5 s Work time: 5 sCooldown: 40 s | Smoke Generator  Number of charges: 3 Number of charges: 3Work time: 20 s Cooldown: 160 s Smoke radius: 450 m Smoke duration: 85 s | Engine Boost  Number of charges: 3 Number of charges: 3Work time: 120 s Cooldown: 120 s Speed bonus: +8% | Torpedo Reload Booster  Number of charges: 2 Number of charges: 2Work time: 1 s Cooldown: 300 s Torpedo reload time: 8 s |
I will have to be honest. I struggled particularly hard with Tashkent ’39. To begin with, I’m not much of a torpedo destroyer player. One might even say that I suck with them and as such, Tashkent was a particularly hard nut to crack.
With her badly lacking firepower, large size, and horrible concealment, she doesn’t exactly offer much room for mistakes in terms of positioning. Even with her amazing top speed, she remains a large target and will be likely to take a lot of damage in an engagement, especially if it’s you finding yourself face-to-face with another destroyer. As such, positioning is particularly important unless you know that you can handle the destroyers in the enemy team.
Generally speaking, if the capture point is large enough that your concealment will not reach the other side of it, you can try to quickly capture it before the enemy destroyer(s) even have the time to get in range. After all, with Swift in silence active, she can reach a speed of more than 54 knots. Otherwise, don’t even try as the enemy destroyers can easily zone you out because of your concealment. Rather use the speed to reach a flank and start dumping torpedoes at enemy ships. However, this is where it gets problematic for Tashkent ’39. Due to her bad concealment and the buffer zone between it and her torpedo firing range, she will be in a rather unfavorable position if you end up on a flank where the enemy just keeps kiting away. She isn’t like other torpedo destroyers that can at least sneak in to deliver torpedo salvos that would have the potential to reach kiting forces. Here, she really needs the guys to come at you, making her a particularly situational ship.
If you want to see the ship in action, here is a commented replay of one of my games:
Main Armament
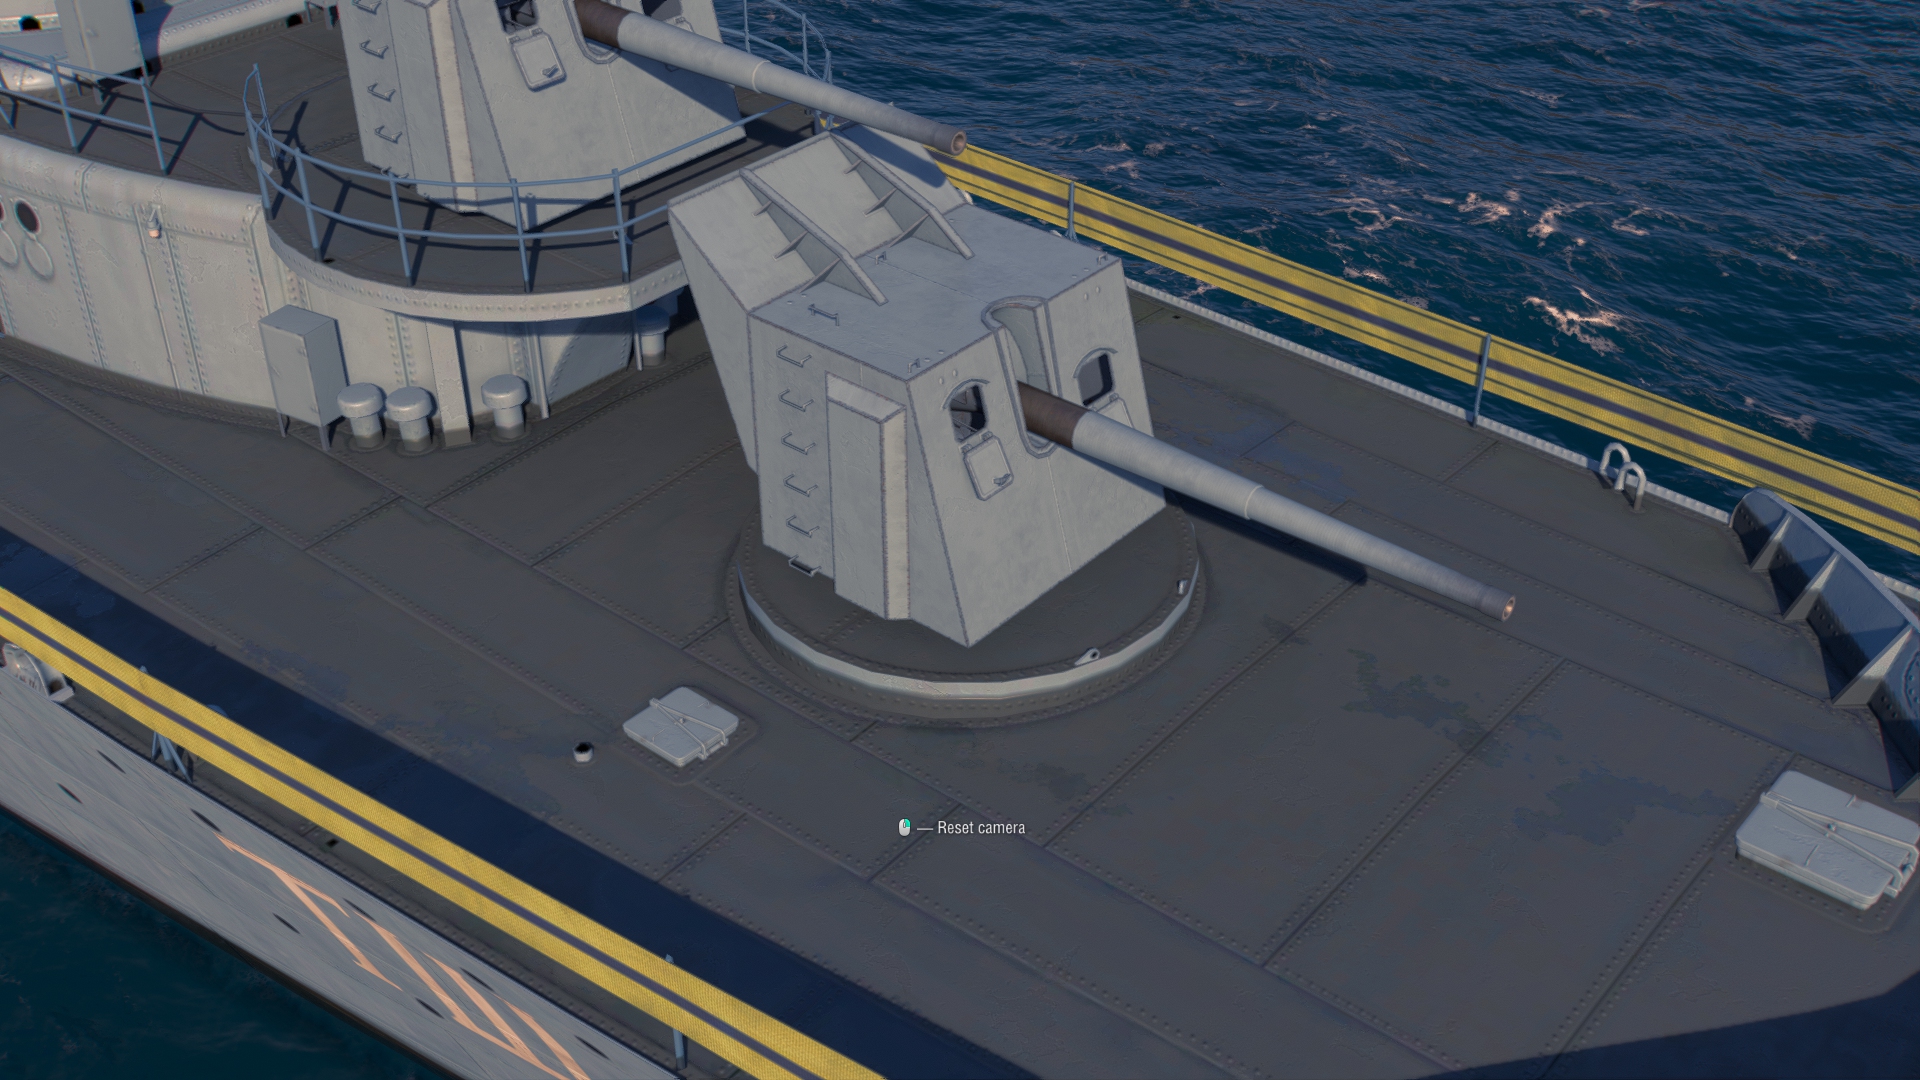
| 3 x 1 130 mm/50 Model 1936 on a B-13 mount Turret n°2 can rotate at 360° | |
| Maximum Firing Range | 10.500 km |
| Reloading Time | 5.0 s |
| 180 Degree Turn Time | 18.6 s |
| Optimal firing angles at the front | 26° |
| Optimal firing angles at the rear | 34° |
| Sigma | 2.0 sigma |
| Maximum Dispersion | 94 m |
| Shells | |
| Type of Projectile | HE – HE-46 |
| Alpha Damage | 1 900 |
| Penetration capacity | 68 mm |
| Explosion size | 6.75 m |
| Fire chance | 8 % |
| Projectile Speed | 870 m/s |
| Air Drag | 0.286 |
| Projectile Mass | 33.4 kg |
| Type of Projectile | AP – SAP-46 |
| Alpha Damage | 2 500 |
| Projectile Speed | 870 m/s |
| Air Drag | 0.286 |
| Projectile Mass | 33.5 kg |
| Projectile Krupp | 1 700 |
| Projectile Detonator | 0.01 s |
| Detonator threshold | 22 mm |
| Ricochet Angles | 45° – 60° |
The firepower of Tashkent ’39 is definitely far from what you would expect from the “original version”. In fact, it is quite the polar opposite of what you would normally expect from a Soviet destroyer. With only three guns, even with their decent reload time, she will struggle to engage other destroyers and will mostly be saved by her generous HP pool more than anything else. Overall, just avoid fights if you are able to.
At least, if needed, she is able to engage large targets while keeping the distance thanks to her good ballistics, combined with her ludicrous speed. Then again, it will only be some cheap damage but it’s better than nothing.
Torpedo Armament
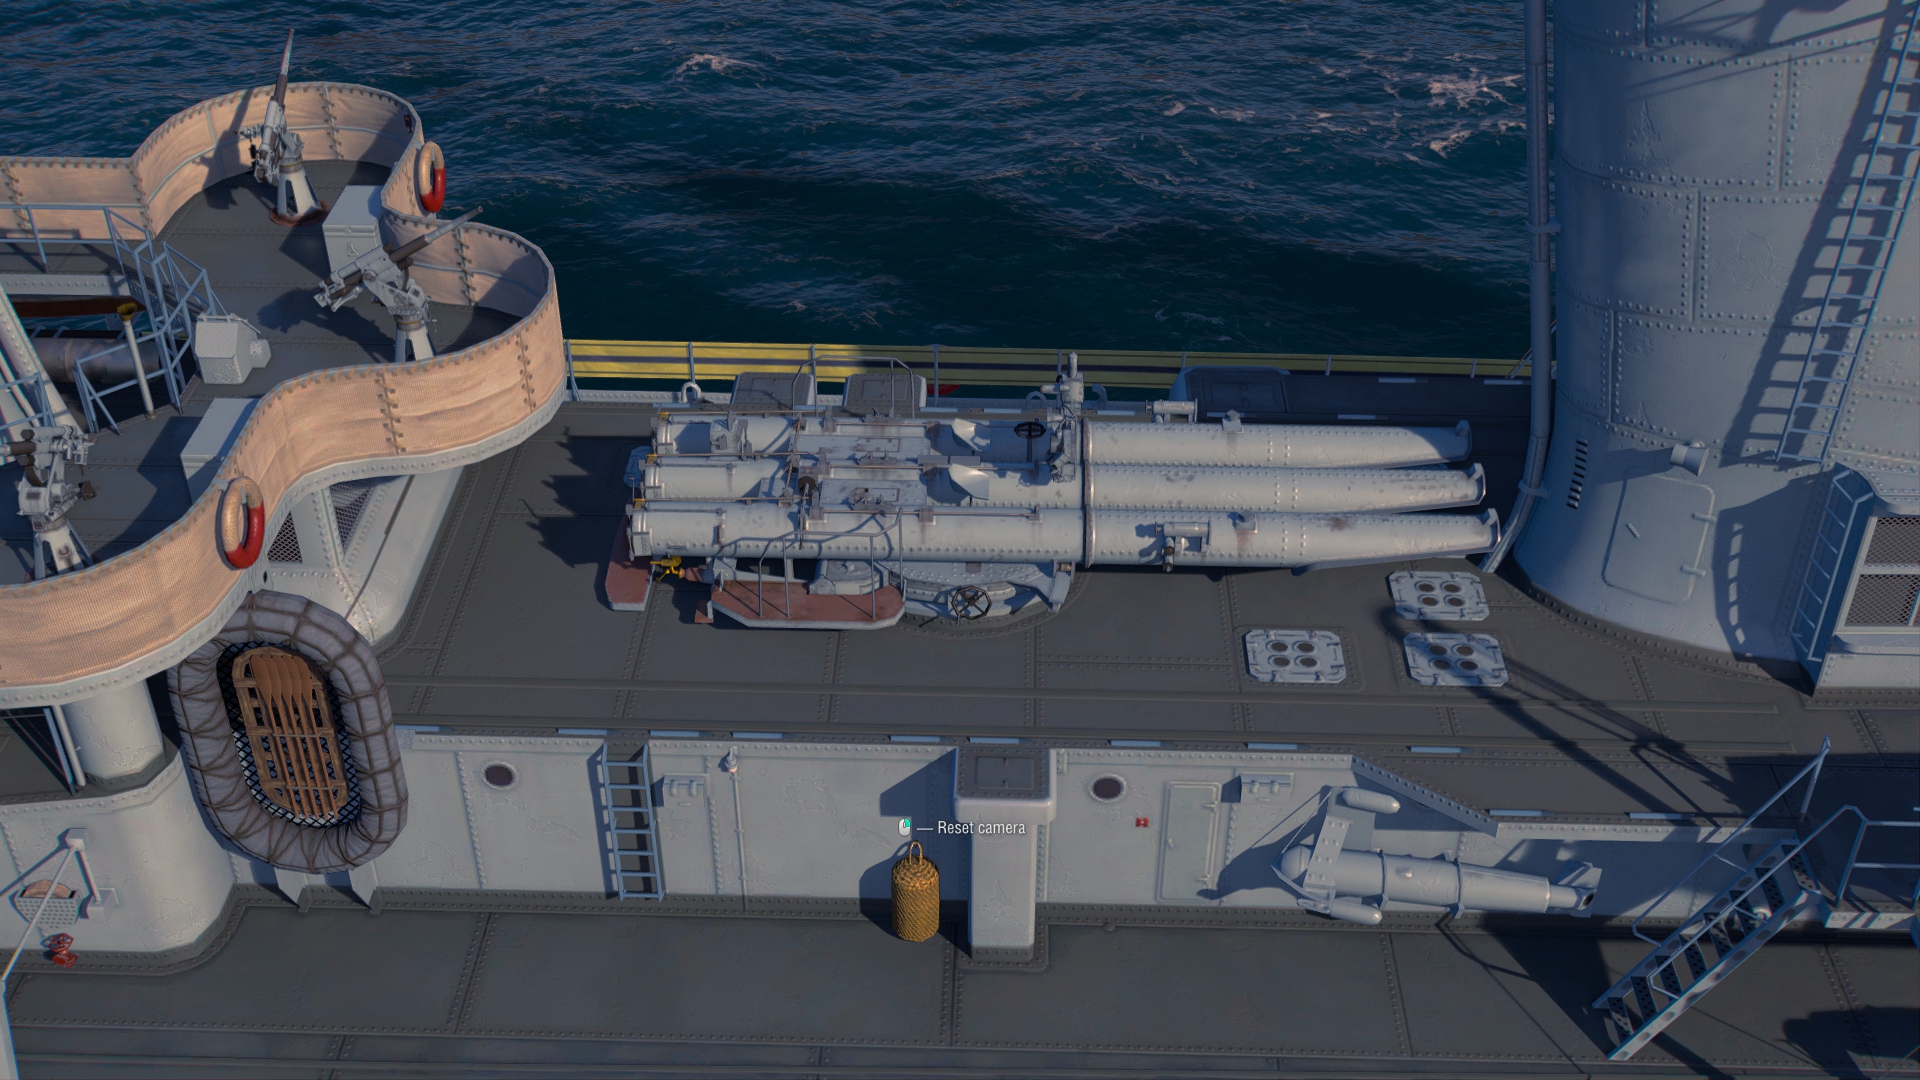
| 3 x 3 533 mm Triple 1-N 53-39 mod. 4  | |
| Reloading Time | 100 s |
| Maximum Distance | 10.000 km |
| Optimal firing angles at the front | 51° |
| Optimal firing angles at the rear | 51° |
| Damage | 15 100 |
| Flooding Chance | 250% |
| Speed | 60 knots |
| Surface Detectability | 1.2 km |
As you might have understood by now, the torpedo armament of Tashkent ’39 will be her main tool to deal damage. Overall, it is definitely a solid torpedo armament at this tier considering that each salvo can deliver up to nine torpedoes. These torpedoes also happen to have a low reaction time of only 7 seconds, making them relatively likely to hit the target unless something ruins your cover.
Beyond the relatively heavy torpedo broadside and low reaction time, Tashkent ’39 was also granted a Torpedo Reload Booster consumable that allows her to deliver in a short time two salvos of torpedoes. Alternatively, it can also be used for particularly bad situations where you need the torpedoes ready immediately. It will be up to you to decide the when and where but chose wisely as you only have 2 charges for this consumable (3 with Superintendent).
The problem with Tashkent’s torpedo armament is the buffer zone between her detection range by sea and her torpedo range. Due to her horrible concealment, she only has a 2.4 km window to drop torpedoes without being spotted. This makes it particularly painful in any situation where you don’t have the target actually coming towards you. If you have to push, getting to use these torpedoes while staying unspotted will be… quite difficult.
Anti-air Armament
| 6 x 1 45 mm 21-K mount | |
| Sector firing range | 0.1 km – 2.5 km |
| Hit chance | 100 % |
| Sector’s damage | 12 |
| Sector’s damage frequency | 0.29 s |
| Sector’s damage per second | 42 |
| 6 x 1 12.7 mm DShK | |
| Sector firing range | 0.1 km – 1.5 km |
| Hit chance | 95 % |
| Sector’s damage | 26 |
| Sector’s damage frequency | 0.29 s |
| Sector’s damage per second | 91 |
Well in terms of anti-air… we have no anti-air. With the combined low DPS and the very short range, carriers will be the bane of your existence if they decide to focus you. Against rockets, you will be somewhat fine because of the speed of the ship but against HE bombs and skip-bombs, you will suffer.
ASW Armament
Shipborne depth charges | |
| Reloading Time | 40 s |
| Number of charges | 2 |
| Number of bombs in payload | 4 |
| Damage | 5 000 |
| Sink speed | 21.5-32.2 m/s |
| Detonation timer | 6.5 – 7.5 s |
| Explosion radius | 800 m |
| Fire chances | 20% |
| Flooding chances | 42% |
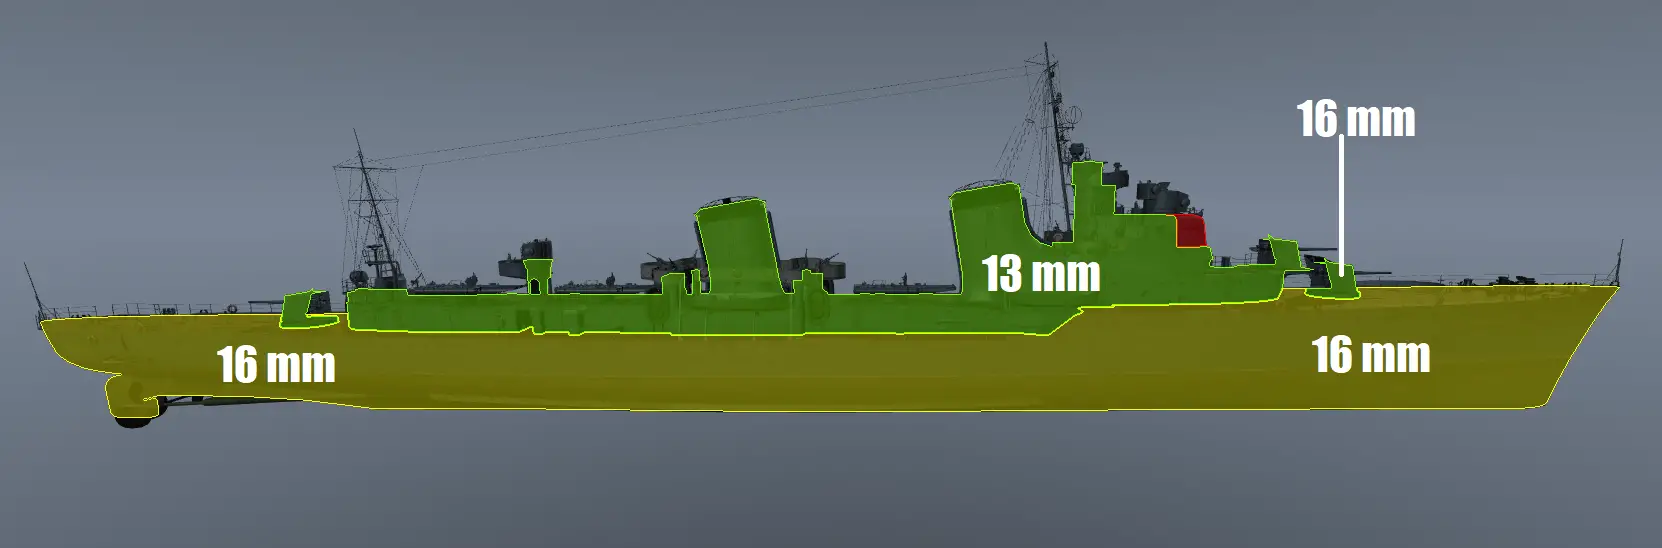
The Armor
External armor protection:
Final Opinion
Generally speaking, I really dislike torpedo-focused destroyers. They are those with the least game impact in my opinion as they mostly rely on torpedoes to get the job done. The thing is that torpedoes have a rather unreliable nature considering everything that can go wrong between the moment you drop them and the moment they reach the target. Torpedo destroyers also happen to be ships that mainly have to stick to a defensive role and when it comes to pushing towards the enemy, this is where things get problematic.
Tashkent is no exception to all of these and, to some extent, makes it even worse. While she can reach some ludicrous speed to flank and has a strong torpedo armament with the extra Torpedo Reload booster, her large size, terrible concealment, and lack of firepower make it so that she particularly suffers when there are multiple destroyers to zone her out or even ships with radars/planes in the air. Her concealment drastically reduces any chance of a stealthy approach and once she is spotted, even with her speed, her large size turns her into a pretty easy target, especially with that turning radius. She might have a large HP pool but it isn’t what will magically solve her problem.
Obviously, she is an incredibly fast destroyer. She is able to pop on the enemy’s side in a completely unexpected manner to then deliver up to eighteen torpedoes. The problem is that she is just so situational, even more so when facing tier VIII/IX matchmaking that it’s challenging to play her to the point where it is downright painful.
I personally just can’t recommend Tashkent ’39, especially considering the event with which she will be released. Her skill floor is incredibly high and most players will just fail to reach it. Get yourself a Hood or even a Gorizia, you will do a lot better with these.
Recommended Build
For the Tashkent ’39, I recommend the following commander build and upgrades:
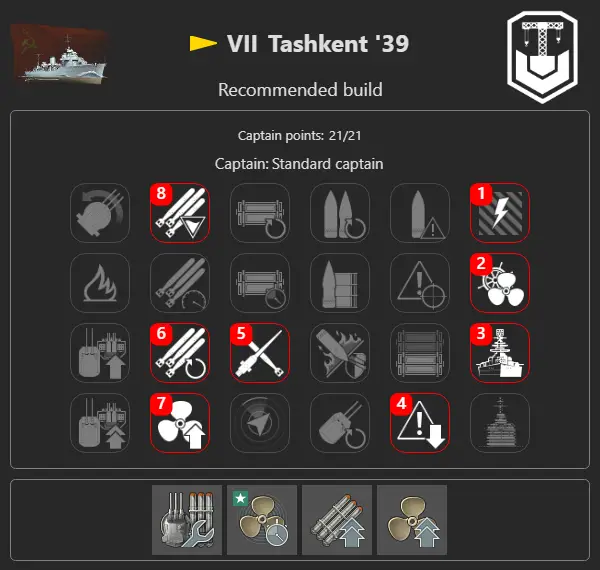
If you have access to him, Alexander Ovechkin with the improved Survivability Expert is worth using.
This concludes my review of Tashkent ’39. Thank you for reading this article!
Don’t hesitate to subscribe to our notifications to ensure you don’t miss any future articles.
Have a good one and see you soon!
Also if you are new to the game or want to get back to it, feel free to use my Recruiting Station code for free goodies such as Premium ships, premium time, and more: https://warships.net/yuzorah
Have a good one and see you soon!