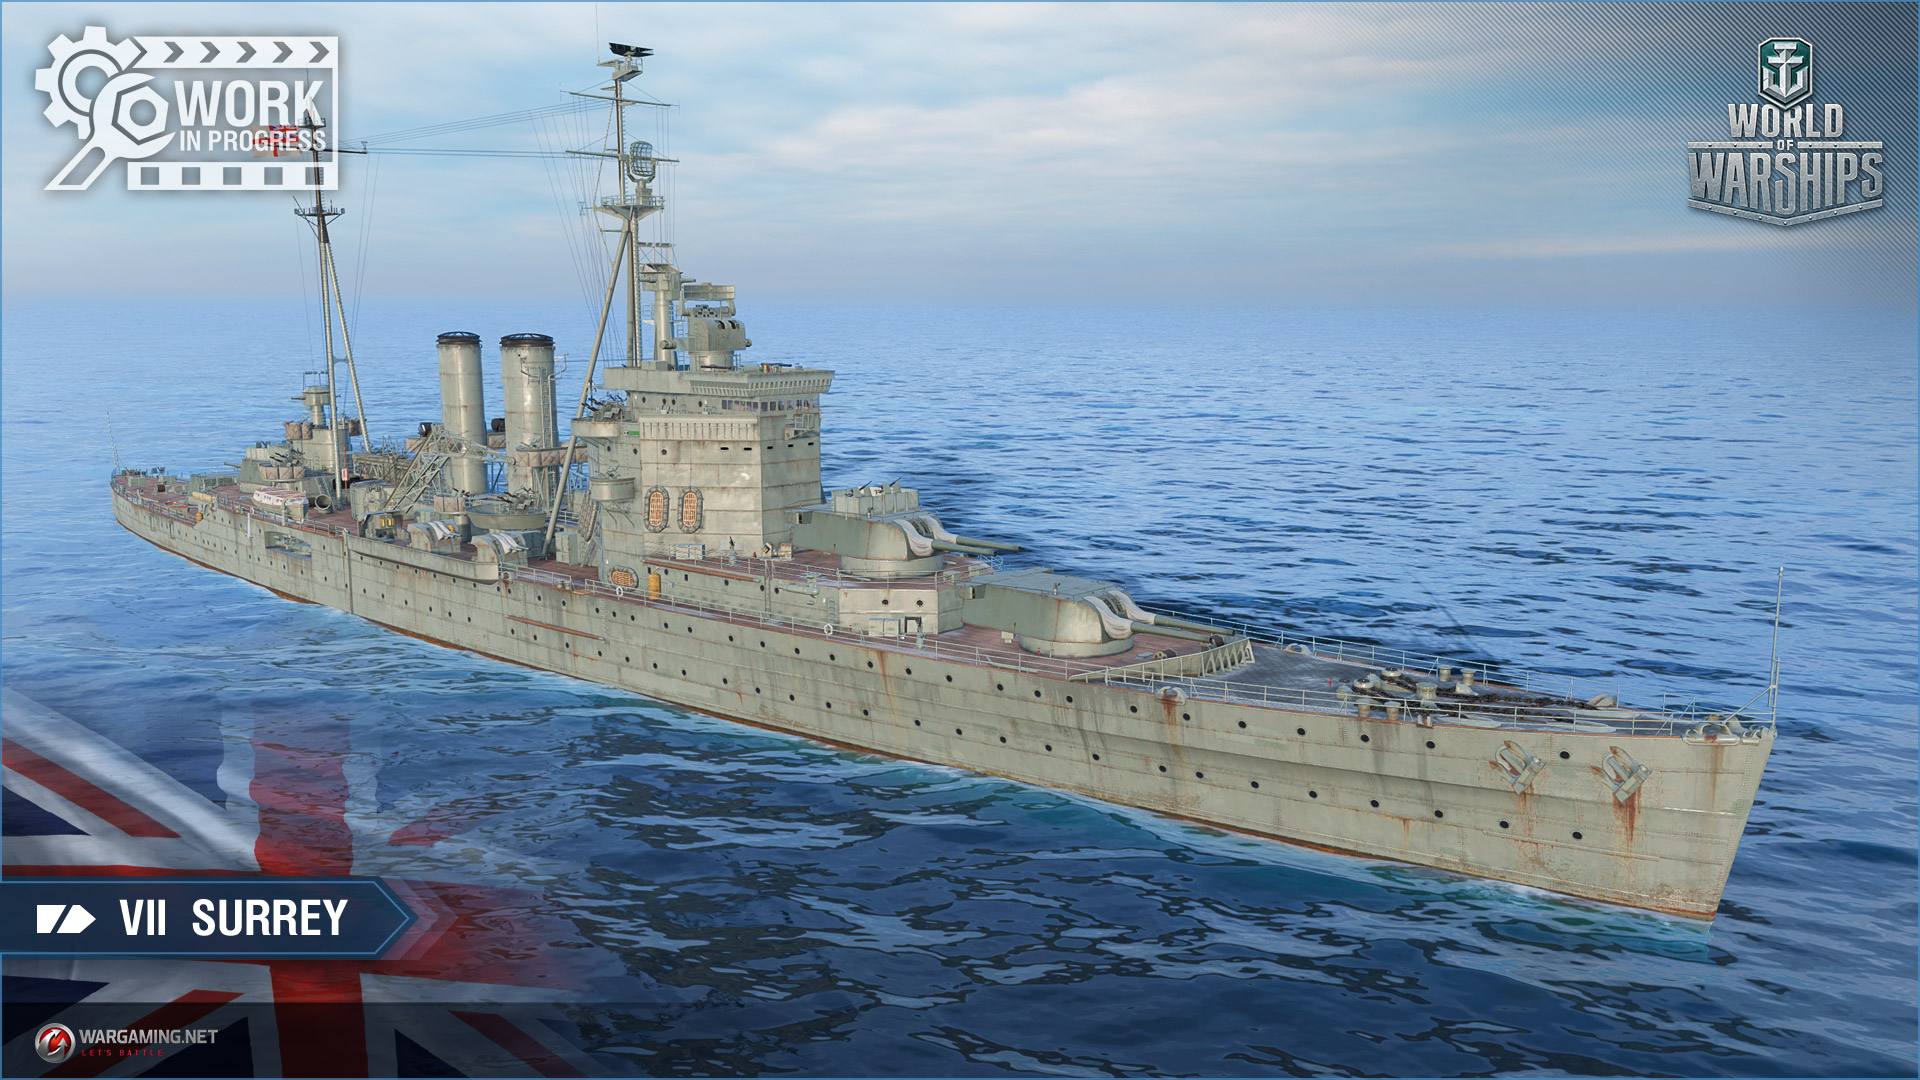
Supertest: British Tier VII Cruiser Surrey
7 min readNow that I’m back from my little trip to Prague, it is time to get back to work with the upcoming British heavy cruisers. Today, let’s talk about the Surrey.
HMS Surrey and HMS Northumberland (design Y) were meant to be the successors to the Norfolk sub-class of heavy cruisers. The design was meant to be a 9 900 tons Heavy cruiser armed with 8 203 mm guns in 4 twin turrets and 2 quadruple torpedo launchers. Another design (Design X) was competing with design Y. Design X would have been larger than the design Y with a top speed of 32 knots instead of 30 knots. However, it was less protected with 400 tons less armor.
In the end, the ships were canceled by the government as well as the following designs.
Hull | Engine | Gun Fire Control System | Main battery | Torpedoes |
Surrey (A) |
Propulsion: 110 000 hp |
Mk VII mod. 1 |
203 mm/50 BL Mk VIII |
533 mm Mk IX* |
Surrey (B) |
Mk VII mod. 2 |


Stock ship
| Tier | VII |
| Health | 30 700 HP |
| Displacement | 10 205 tons |
| Main Armament | |
| Maximum Firing Range | 13.470 km |
| 203 mm/50 BL Mk VIII | 4 x 2 203 mm |
| Secondary Armament | |
| Maximum Firing Range | 4.500 km |
| 102 mm/45 QF Mk XIX | 6 x 2 102 mm |
| Torpedo Armament | |
| Maximum Firing Range | 8.000 km |
| 533 mm QR Mk IV | 2 x 4 533 mm |
| Maximum speed | 30 kt |
| Turning Circle Radius | 660 m |
| Rudder Shift Time | 13.1 s |
| Surface Detectability | 11.16 km |
| Air Detectability | 6.26 km |
| Detectability After Firing Main Gus in Smoke | 6.18 km |
| 4 x 2 203 mm/50 BL Mk VIII | |
| Reloading Time | 11 s |
| 180 Degree Turn Time | 22.5 s |
| Optimal firing angles at the front | 37° |
| Optimal firing angles at the rear | 32° |
| Sigma | 2.00 sigma |
| Maximum Dispersion | 123 m |
| Shells | |
| Type of Projectile | HE – 203 mm HE 256 lb |
| Alpha Damage | 2 850 HP |
| Damage | 1 230 HP |
| Penetration capacity | 33 mm |
| Explosion size | 0.86 |
| Fire chance | 15 % |
| Projectile Speed | 814 m/s |
| Air Drag | 0.304 |
| Projectile Mass | 116.1 |
| Type of Projectile | AP – 203 mm AP 256 lb |
| Alpha Damage | 4 500 HP |
| Chance to Cause Fire | -0.5 % |
| Projectile Speed | 814 m/s |
| Air Drag | 0.304 |
| Projectile Mass | 116.1 |
| Projectile Krupp | 2 400 |
| Projectile Detonator | 0.033 s |
| Detonator threshold | 34 mm |
| 6 x 2 102 mm/45 QF Mk XIX | |
| Reloading Time | 3.0 s |
| Sigma | 1.00 sigma |
| Shells | |
| Type of Projectile | HE – 102 mm HE 35 lb |
| Alpha Damage | 1 500 HP |
| Damage | 310 HP |
| HE penetration | 16 mm |
| Explosion Size | 0.3 |
| Chance to Cause Fire | 6 % |
| Projectile Speed | 811 m/s |
| Air Drag | 0.33 |
| Projectile Mass | 15.88 |
| 2 x 4 533 mm QR Mk IV 533 mm Mk IX* | |
| Reloading Time | 96 s |
| Maximum Distance | 8.0 km |
| Optimal firing angles at the front | 42° |
| Optimal firing angles at the rear | 44° |
| Damage | 15 867 |
| Speed | 61 kt |
| Surface Detectability | 1.3 km |
| 6 x 2 102 mm/45 QF Mk XIX | |
| Sector range | 0.1 km – 5.8 km |
| Hit chance | 90 % |
| Sector’s damage | 21 |
| Sector’s damage frequency | 0.29 s |
| Sector’s damage per second | 74 |
| Flak clouds number | 3 |
| Flak cloud damage | 1 190 |
| 7 x 4 40 mm Vickers 2-pdr. Mk VII | |
| Sector range | 0.1 km – 2.5 km |
| Hit chance | 90 % |
| Sector’s damage | 55 |
| Sector’s damage frequency | 0.29 s |
| Sector’s damage per second | 193 |
| 12 x 1 20 mm Oerlikon Mk IV | |
| Sector range | 0.1 km – 2.0 km |
| Hit chance | 85 % |
| Sector’s damage | 29 |
| Sector’s damage frequency | 0.29 s |
| Sector’s damage per second | 102 |
Slot 1 | Slot 2 | Slot 3 | Slot 4 |
Damage Control Party I  Work time: 5 s Cooldown: 90 s | Repair Party I  Number of charges: 2 Work time: 28 s Cooldown: 120 s HP regeneration speed: 0.5% HP/s | Hydroacoustic Search I  Number of charges: 2 Work time: 180 s Cooldown: 180 s Torpedo detection range: 3.0 km Ship detection range: 3.0 km | Spotting Aircraft I  Number of charges: 3 Work time: 100 s Cooldown: 360 s Bonus: +20% maximum firing range |
Damage Control Party II  Work time: 5 s Cooldown: 60 s | Repair Party II  Number of charges: 3 Work time: 28 s Cooldown: 80 s HP regeneration speed: 0.5% HP/s | Hydroacoustic Search II  Number of charges: 3 Work time: 180 s Cooldown: 120 s Torpedo detection range: 3.0 km Ship detection range: 3.0 km | Spotting Aircraft II  Number of charges: 4 Work time: 100 s Cooldown: 240 s Bonus: +20% maximum firing range |
Fully upgraded
| Tier | VII |
| Health | 35 300 HP |
| Displacement | 12 995 tons |
| Main Armament | |
| Maximum Firing Range | 14.817 km |
| 203 mm/50 BL Mk VIII | 4 x 2 203 mm |
| Secondary Armament | |
| Maximum Firing Range | 4.500 km |
| 102 mm/45 QF Mk XIX | 6 x 2 102 mm |
| Torpedo Armament | |
| Maximum Firing Range | 8.000 km |
| 533 mm QR Mk IV | 2 x 4 533 mm |
| Maximum speed | 30 kt |
| Turning Circle Radius | 660 m |
| Rudder Shift Time | 9.4 s |
| Surface Detectability | 11.16 km |
| Air Detectability | 6.26 km |
| Detectability After Firing Main Gus in Smoke | 6.18 km |
| 4 x 2 203 mm/50 BL Mk VIII | |
| Reloading Time | 11 s |
| 180 Degree Turn Time | 22.5 s |
| Optimal firing angles at the front | 37° |
| Optimal firing angles at the rear | 32° |
| Sigma | 2.00 sigma |
| Maximum Dispersion | 123 m |
| Shells | |
| Type of Projectile | HE – 203 mm HE 256 lb |
| Alpha Damage | 2 850 HP |
| Damage | 1 230 HP |
| Penetration capacity | 33 mm |
| Explosion size | 0.86 |
| Fire chance | 15 % |
| Projectile Speed | 814 m/s |
| Air Drag | 0.304 |
| Projectile Mass | 116.1 |
| Type of Projectile | AP – 203 mm AP 256 lb |
| Alpha Damage | 4 500 HP |
| Chance to Cause Fire | -0.5 % |
| Projectile Speed | 814 m/s |
| Air Drag | 0.304 |
| Projectile Mass | 116.1 |
| Projectile Krupp | 2 400 |
| Projectile Detonator | 0.033 s |
| Detonator threshold | 34 mm |
| 6 x 2 102 mm/45 QF Mk XIX | |
| Reloading Time | 3.0 s |
| Sigma | 1.00 sigma |
| Shells | |
| Type of Projectile | HE – 102 mm HE 35 lb |
| Alpha Damage | 1 500 HP |
| Damage | 310 HP |
| HE penetration | 16 mm |
| Explosion Size | 0.3 |
| Chance to Cause Fire | 6 % |
| Projectile Speed | 811 m/s |
| Air Drag | 0.33 |
| Projectile Mass | 15.88 |
| 2 x 4 533 mm QR Mk IV 533 mm Mk IX* | |
| Reloading Time | 96 s |
| Maximum Distance | 8.0 km |
| Optimal firing angles at the front | 42° |
| Optimal firing angles at the rear | 44° |
| Damage | 15 867 |
| Speed | 61 kt |
| Surface Detectability | 1.3 km |
| 6 x 2 102 mm/45 QF Mk XIX | |
| Sector range | 0.1 km – 5.8 km |
| Hit chance | 90 % |
| Sector’s damage | 21 |
| Sector’s damage frequency | 0.29 s |
| Sector’s damage per second | 74 |
| Flak clouds number | 3 |
| Flak cloud damage | 1 190 |
| 4 x 8 40 mm Vickers 2-pdr. Mk VIII 4 x 4 40 mm Vickers 2-pdr. Mk VII | |
| Sector range | 0.1 km – 2.5 km |
| Hit chance | 90 % |
| Sector’s damage | 72 |
| Sector’s damage frequency | 0.29 s |
| Sector’s damage per second | 252 |
| 12 x 2 20 mm Oerlikon Mk V | |
| Sector range | 0.1 km – 2.0 km |
| Hit chance | 85 % |
| Sector’s damage | 29 |
| Sector’s damage frequency | 0.29 s |
| Sector’s damage per second | 165 |
Slot 1 | Slot 2 | Slot 3 | Slot 4 |
Damage Control Party I Work time: 5 s Cooldown: 90 s | Repair Party I Number of charges: 2 Work time: 28 s Cooldown: 120 s HP regeneration speed: 0.5% HP/s | Hydroacoustic Search I Number of charges: 2 Work time: 180 s Cooldown: 180 s Torpedo detection range: 3.0 km Ship detection range: 3.0 km | Spotting Aircraft I Number of charges: 3 Work time: 100 s Cooldown: 360 s Bonus: +20% maximum firing range |
Damage Control Party II Work time: 5 s Cooldown: 60 s | Repair Party II Number of charges: 3 Work time: 28 s Cooldown: 80 s HP regeneration speed: 0.5% HP/s | Hydroacoustic Search II Number of charges: 3 Work time: 180 s Cooldown: 120 s Torpedo detection range: 3.0 km Ship detection range: 3.0 km | Spotting Aircraft II Number of charges: 4 Work time: 100 s Cooldown: 240 s Bonus: +20% maximum firing range |
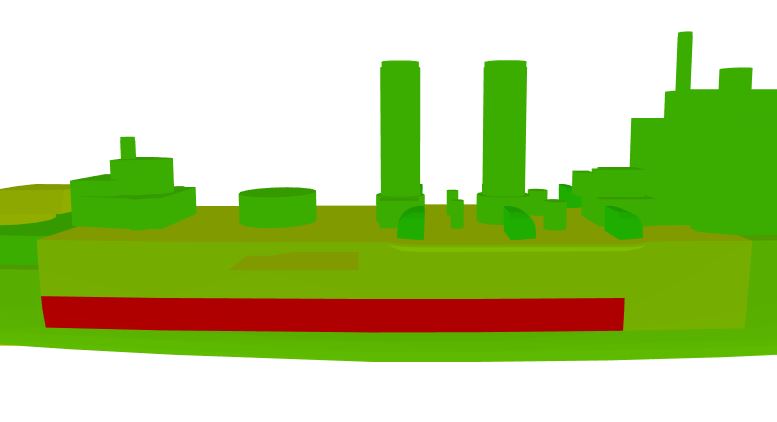
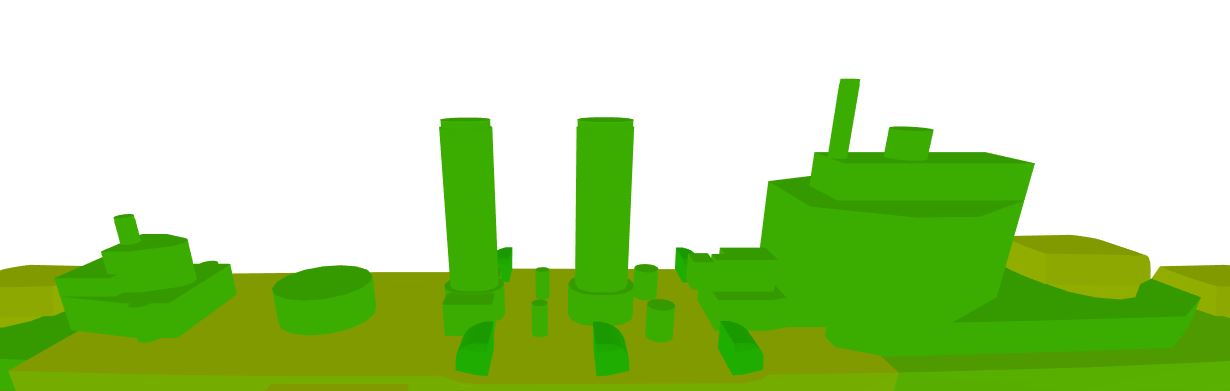
The armor
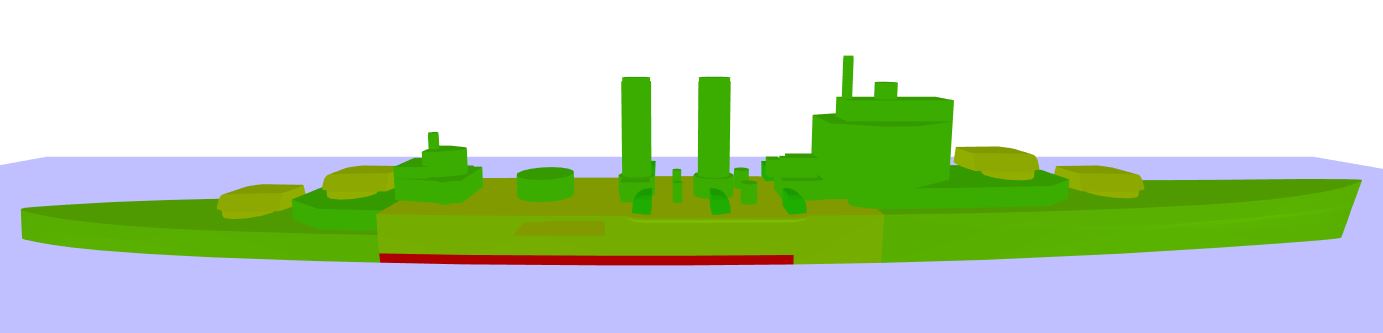
The Surrey is marking a bit of a turn in the British heavy cruiser line. The Royal Navy apparently understood that it might be better to have heavy cruisers actually able to receive hits from enemy heavy cruiser and for that, a bit more armor would be appreciated.
The bow section
The bow remains the classic 16 mm plating that we see on tier VII cruisers. Just like all the previous ships, it is very long and goes all the way to the forward superstructure.
The upper casemate protecting the middle section is only 19 mm thick and just under it, there is the 16 mm citadel athwartship. These plates are far back in the ship and for the athwartship, it is deep below the water so don’t worry too much about it. Enemy ships will struggle to reach it thanks to its position.
The middle section
The middle section is very short when considering the full length of the ship. The deck is 25 mm which will give the ship the possibility to bounce AP shells of a caliber up to 356 mm. The sides are only 19 mm sadly so any battleship will be able to overmatch them as well as Azuma, Alaska and Kronshtadt (and Siegfried when she will finally be released).
The main belt, that is even shorter than the middle section itself is 152 mm thick. From the top of my head, this is actually the thickest at this tier for a cruiser.
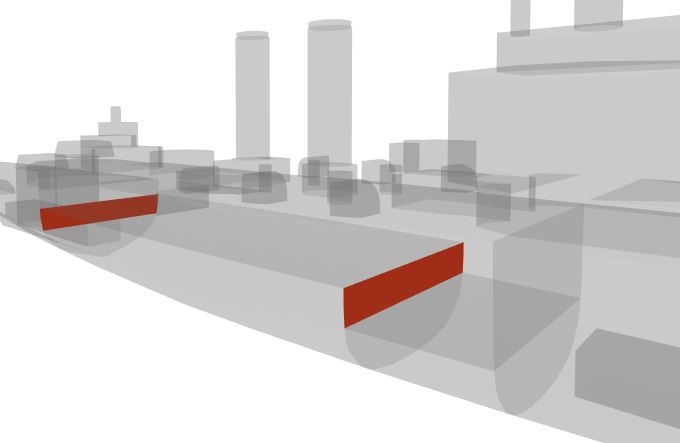
Forward of the main belt, the citadel goes down below the waterline and the plating linking the 2 parts is 140 mm thick just like the rear athwartship.
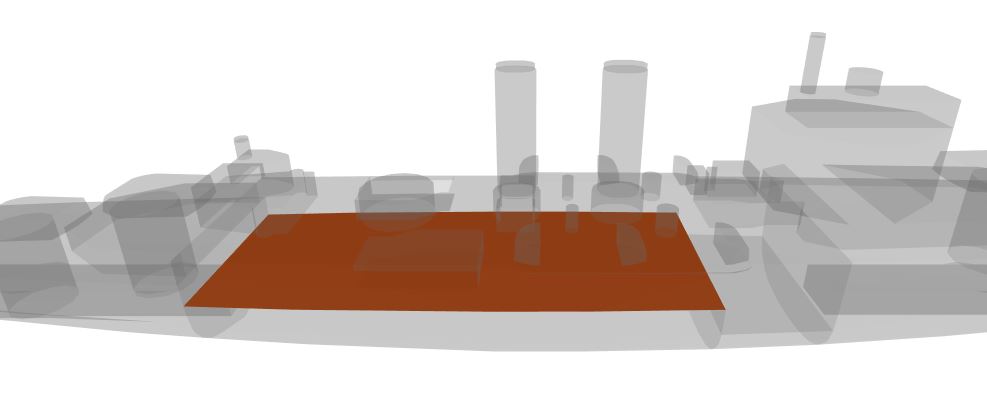
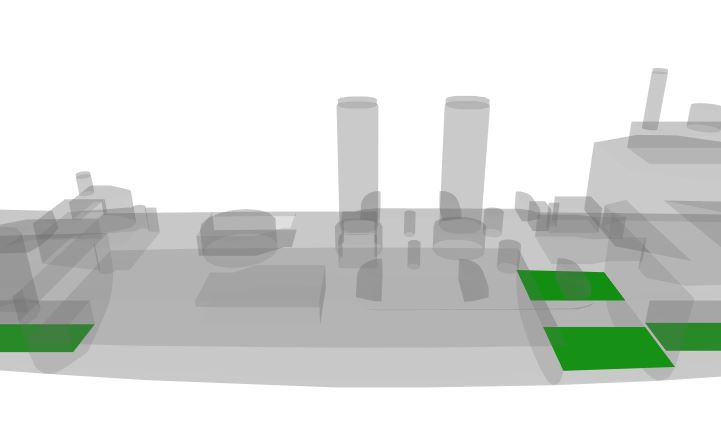
For the horizontal protection, it is surprisingly thick with 102 mm of armor for the raised part. The underwater part is however very thin with 16 mm on the side and 25 mm at the center. Now… the section might be deep enough for AP bombs to detonate before reaching it.
The stern section
The stern has the classic 16 mm plating. Except that, the upper casemate protecting the middle section is 19 mm thick. For the citadel athwartship, as I showed above, it’s 140 mm thick for the exposed part and 16 mm below water.
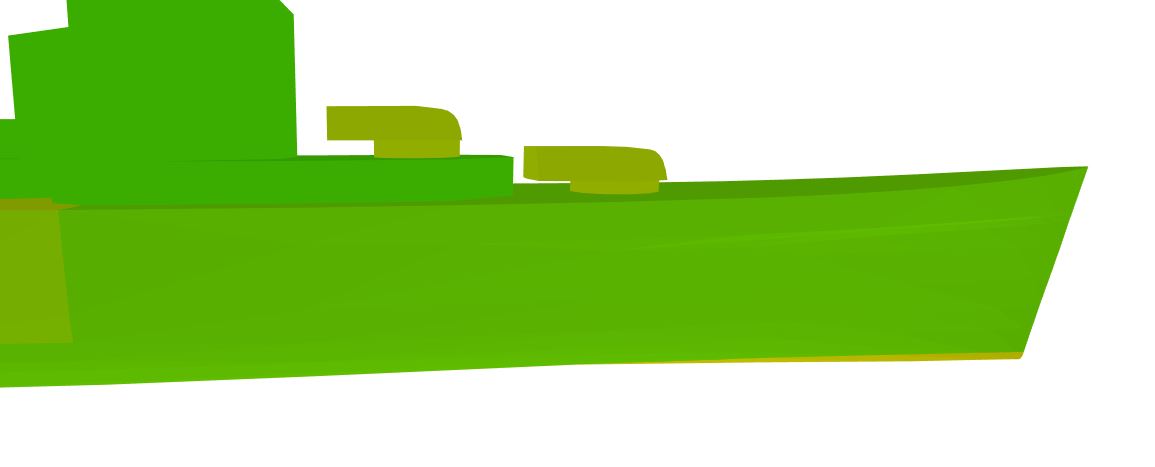
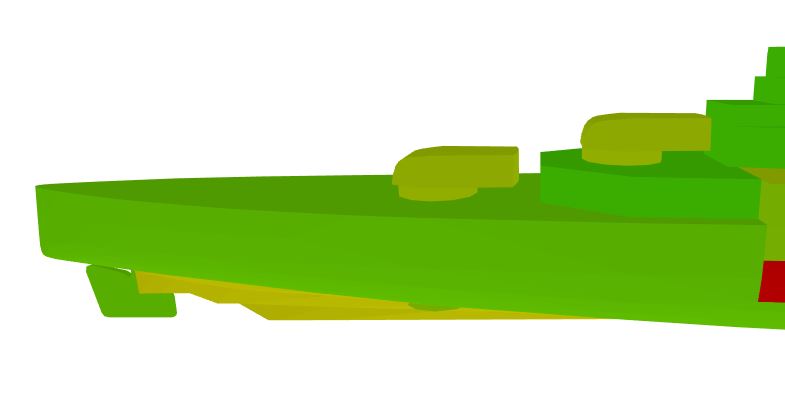
The superstructure
The superstructure is 13 mm thick, the standard protection at tier VII. It’s also way more compact that than the superstructure of the Devonshire.
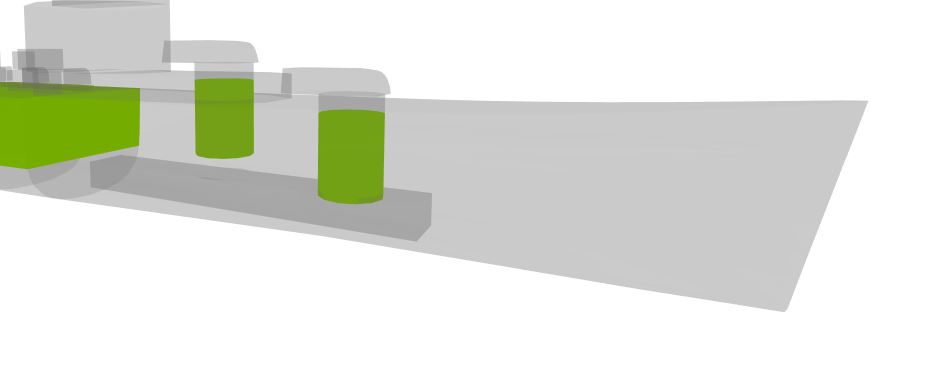
The turrets
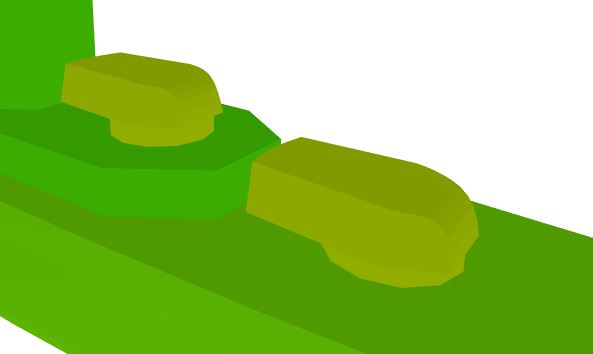
The turrets remain the same as those found on the Devonshire, London or Exeter. They are entirely protected by 25 mm of armor and the barbette as well. HE from cruisers will be able to cripple these turrets.
Personal Opinion
The Surrey is, for now, a bit disappointing. The limited range is starting to be a massive issue since you can end up against tier IX ships. The armor looks at least effective against enemy battleships due to the very small citadel so it will be an overpenetration fiesta but if it’s not the case… back to port.
The terrible speed is also worth mentioning since the ship is taking the spot of the slowest tier VII cruiser.
As a side note, there seems to be an issue with her long-range anti-air that is weaker with 50% more guns than Devonshire’s long-range anti-air. The same goes for her secondaries range that has a shorter range (4.5 km) than the Devonshire with 5.0km.